
Batch QC allows you to rapidly address large data sets with many records. You can run Batch QC on an entire service layer or an existing queue. It is a tool designed to save you time. For example, if you have a thousand points to address, you may not have time to manually address all of them. Let Batch QC do the work of automatically snapping your points to flowlines within the snap tolerance. Then you can manually inspect only those points that did not automatically snap.
If your data has been previously been addressed and already has a ReachCode or GNIS_NAME, HydroAdd will snap it to the flowline with a matching ReachCode or GNIS_NAME. Batch QC prioritizes ReachCode over GNIS_NAME but can use either. For example, you may have point events that have previously been addressed to the NHDPlus V2. Batch QC will snap the point events to a matching ReachCode in the NHD, if it is within the snap tolerance.
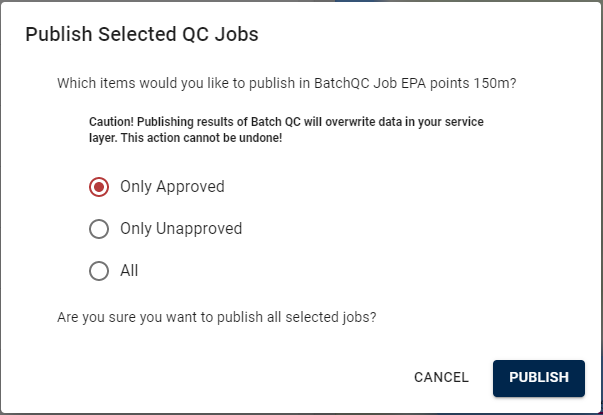
Batch QC results reside on the HydroAdd application server—your data are not updated to AGOL until you publish. Results of Batch QC jobs are always available in the Batch QC queue--even after you publish or remove the corresponding service layer from AGOL. You should always review the results of Batch QC before you publish the results to your service layer on AGOL. This acts as a safeguard to protect your data because it allows to you to try different snap tolerances before you publish. You cannot undo the edits to your service layer once HydroAdd publishes the updates. In any case, you should always keep a copy of your original data and ArcGIS Pro project.
The Batch QC panes lists all the batch jobs you have run. You can filter the jobs list by date range, or sort by created/completed date. The Batch QC results listed in the Batch QC Pane reside on the HydroAdd application server—your data are not updated to AGOL until you publish. Results of Batch QC jobs are always available in the Batch QC pane--even after you publish or remove the corresponding service layer from AGOL.
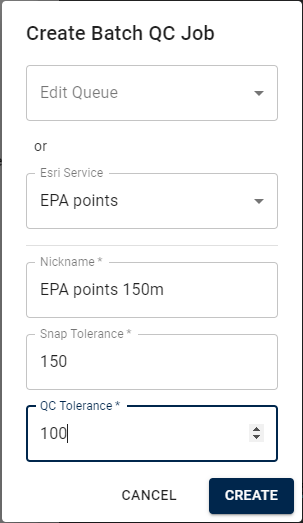
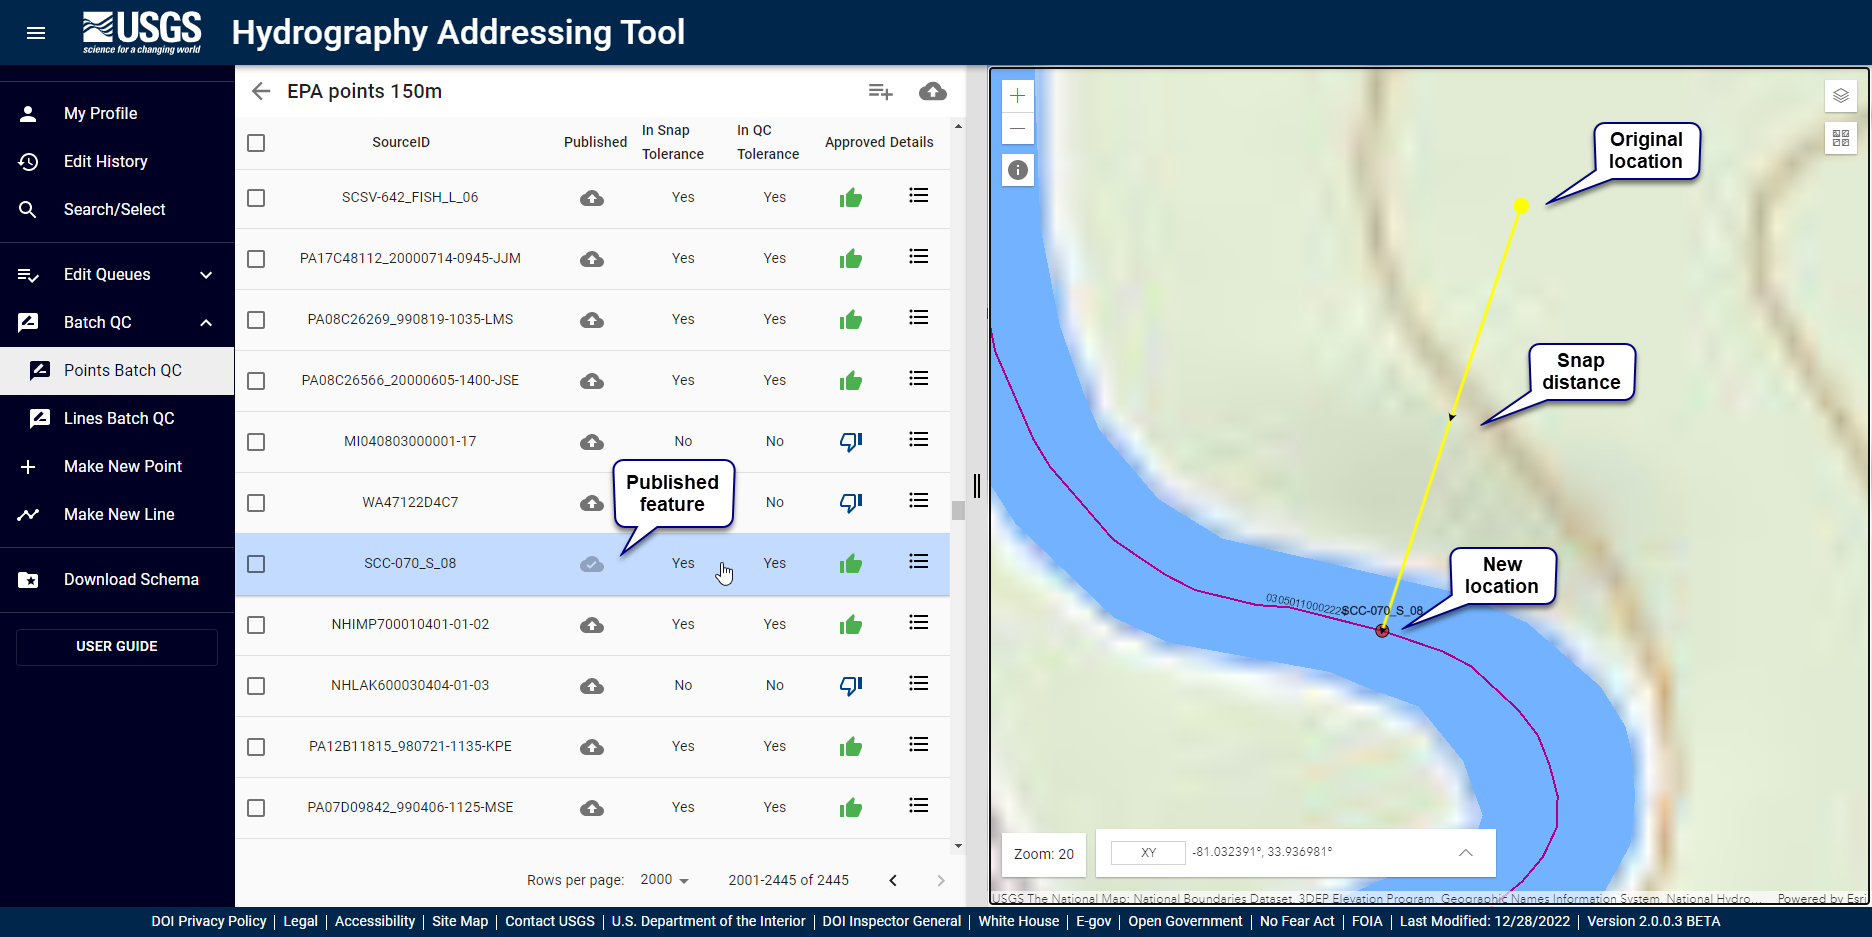
User input. The maximum distance you allow Batch QC to move a point to a flowline. Snap Tolerance is essentially a buffer around the input point. If there is a flowline feature within the snap tolerance of the input point, Batch QC will snap it.
See also HydroAdd Point Schema.
See also Point Batch QC logic.
User input. The maximum snap distance where the point is automatically approved. If a flowline is within the snap tolerance of the input point, Batch QC will snap it to the flowline, in all cases. However, automatic approval by Batch QC depends on the QC tolerance. If the snap distance is greater than the QC tolerance, then the point is not approved.
Tips for setting QC tolerance
See also HydroAdd Point Schema.
See also Point Batch QC logic.
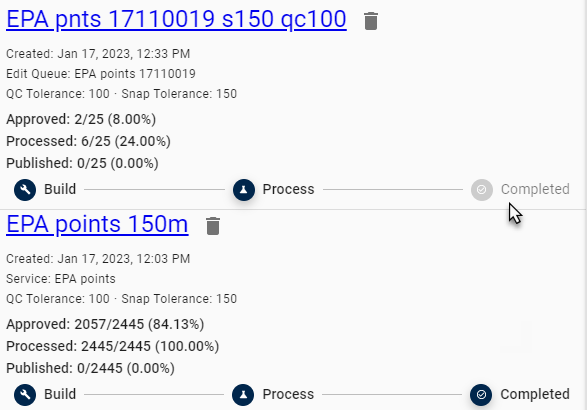
The Batch QC Job Status shows:

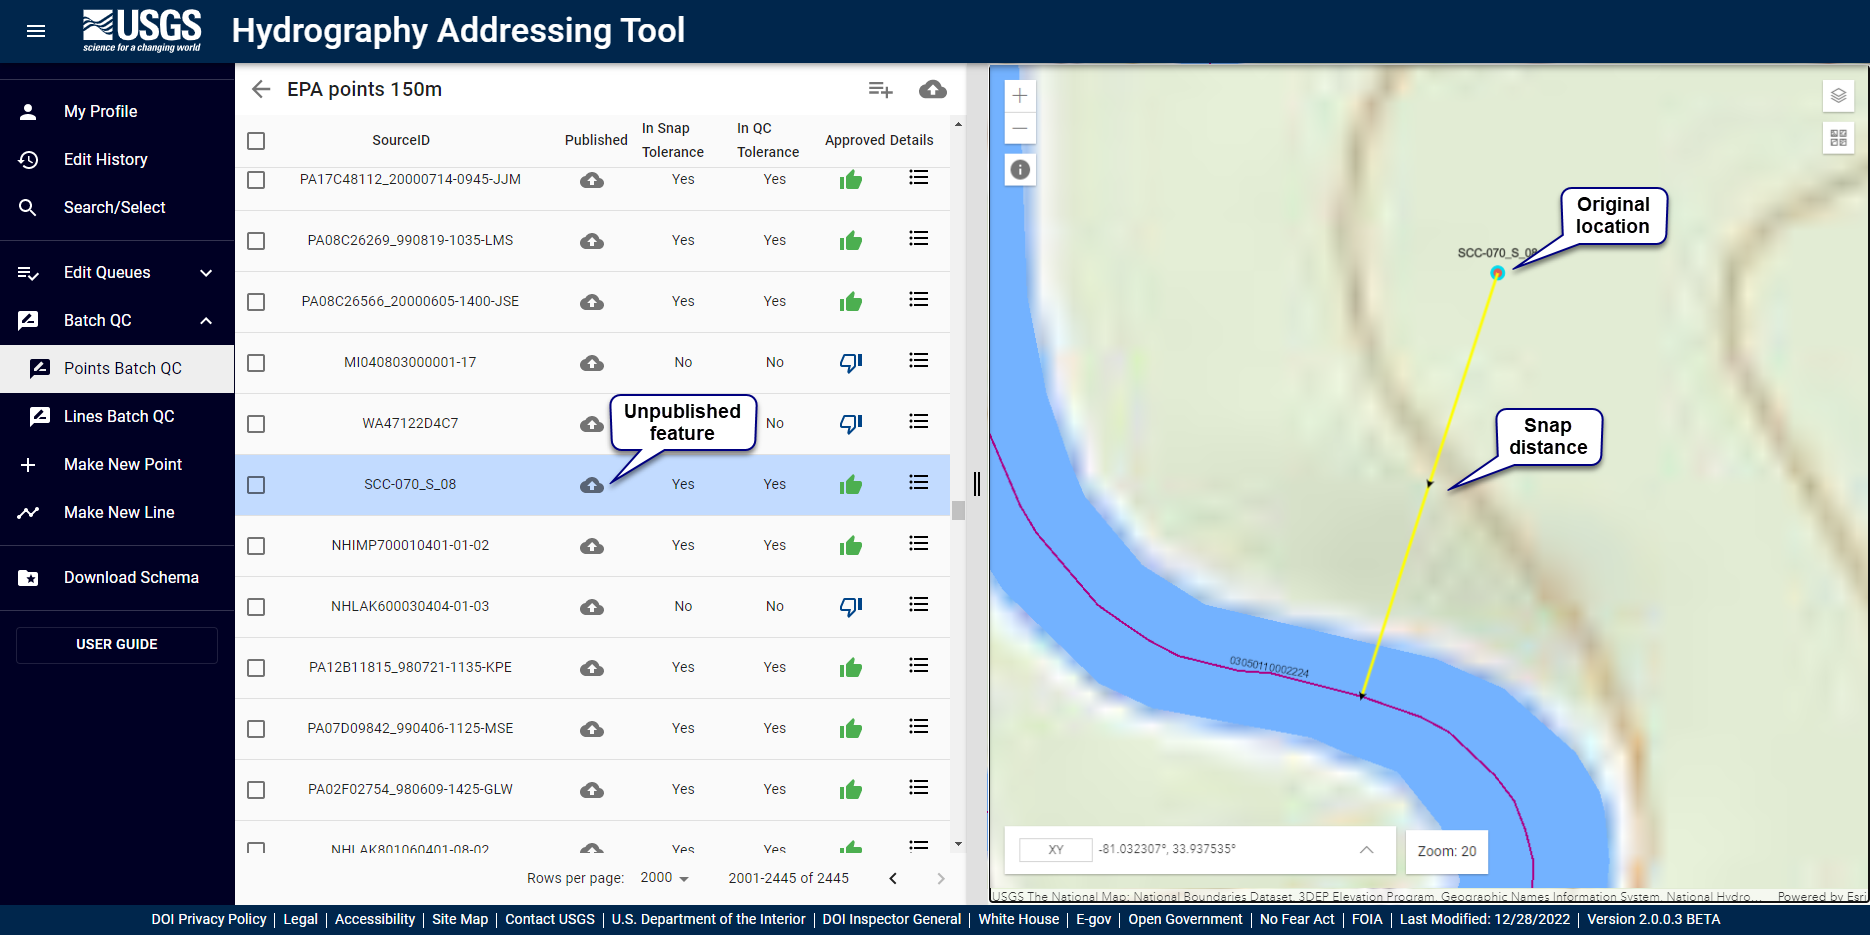
The Batch QC Review Queue allows you to review the Batch QC results before you publish to AGOL. Batch QC results reside on the HydroAdd application server—your data are not updated to AGOL until you publish. Results of Batch QC jobs are always available in the Batch QC pane—even after you publish or remove the corresponding service layer from AGOL. You should always review the results of Batch QC before you publish the results to your service layer on AGOL. This acts as a safeguard to protect your data because it allows to you to try different snap tolerances before you publish. You cannot undo the edits to your data once HydroAdd publishes the updates. In any case, you should always keep a copy of your original data and ArcGIS Pro project.
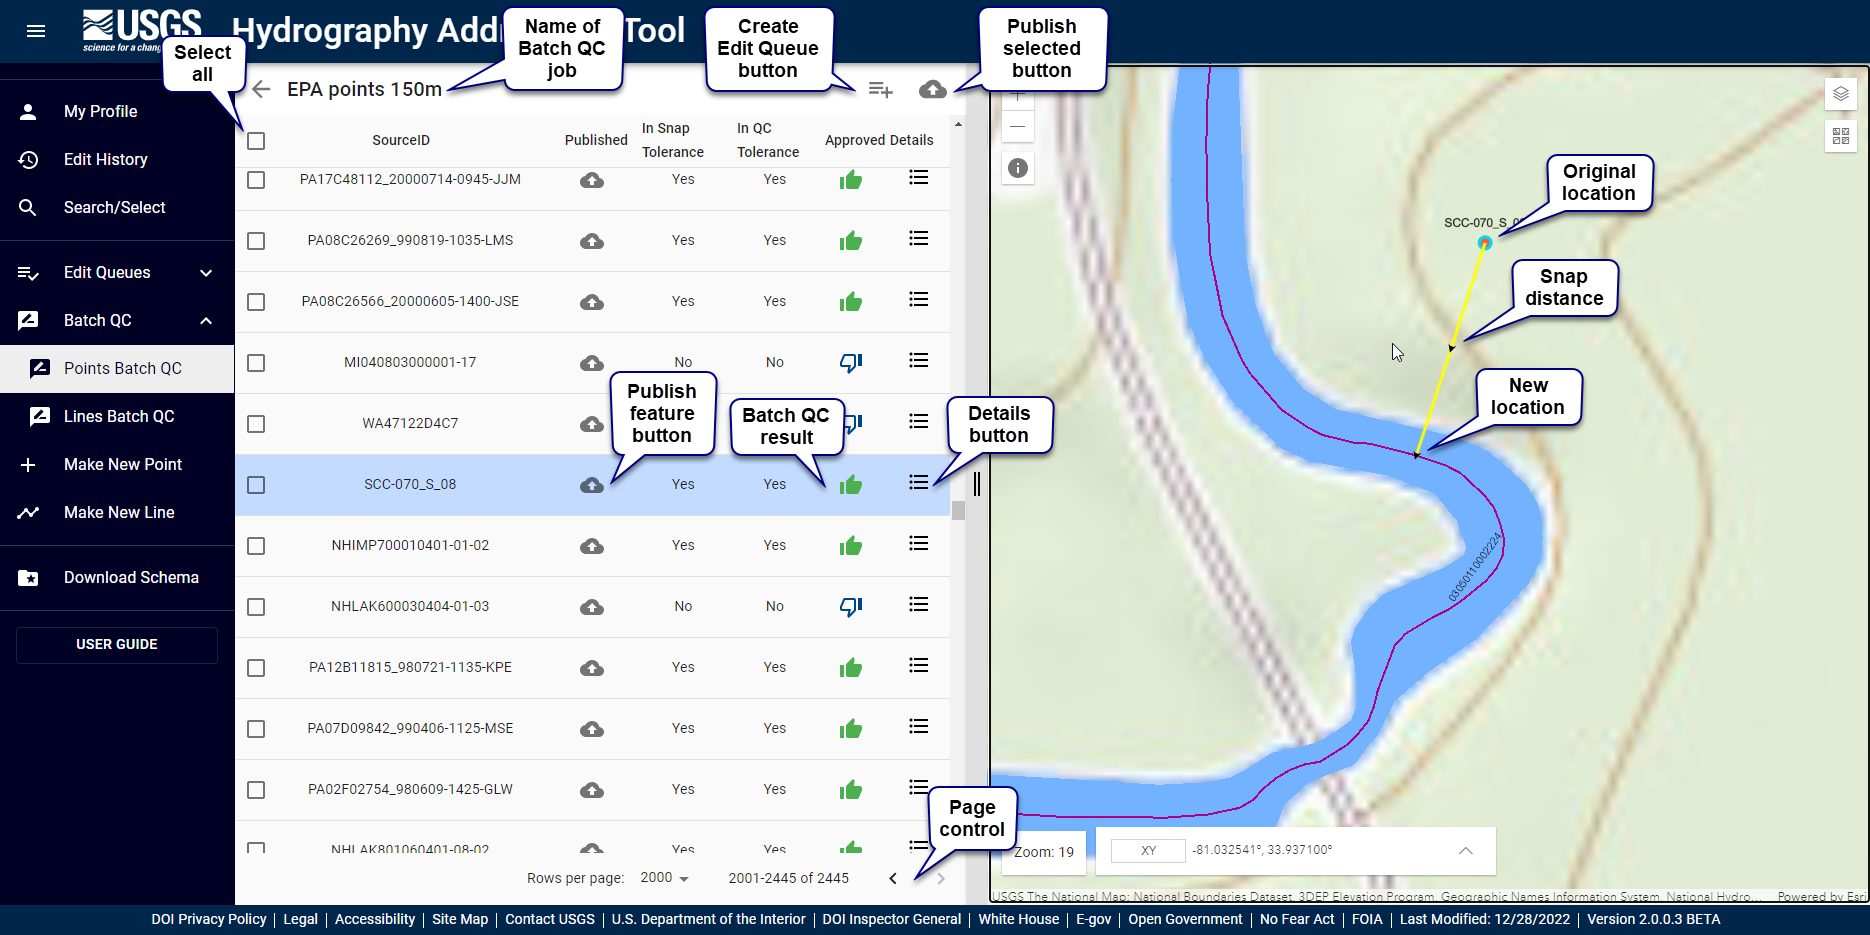
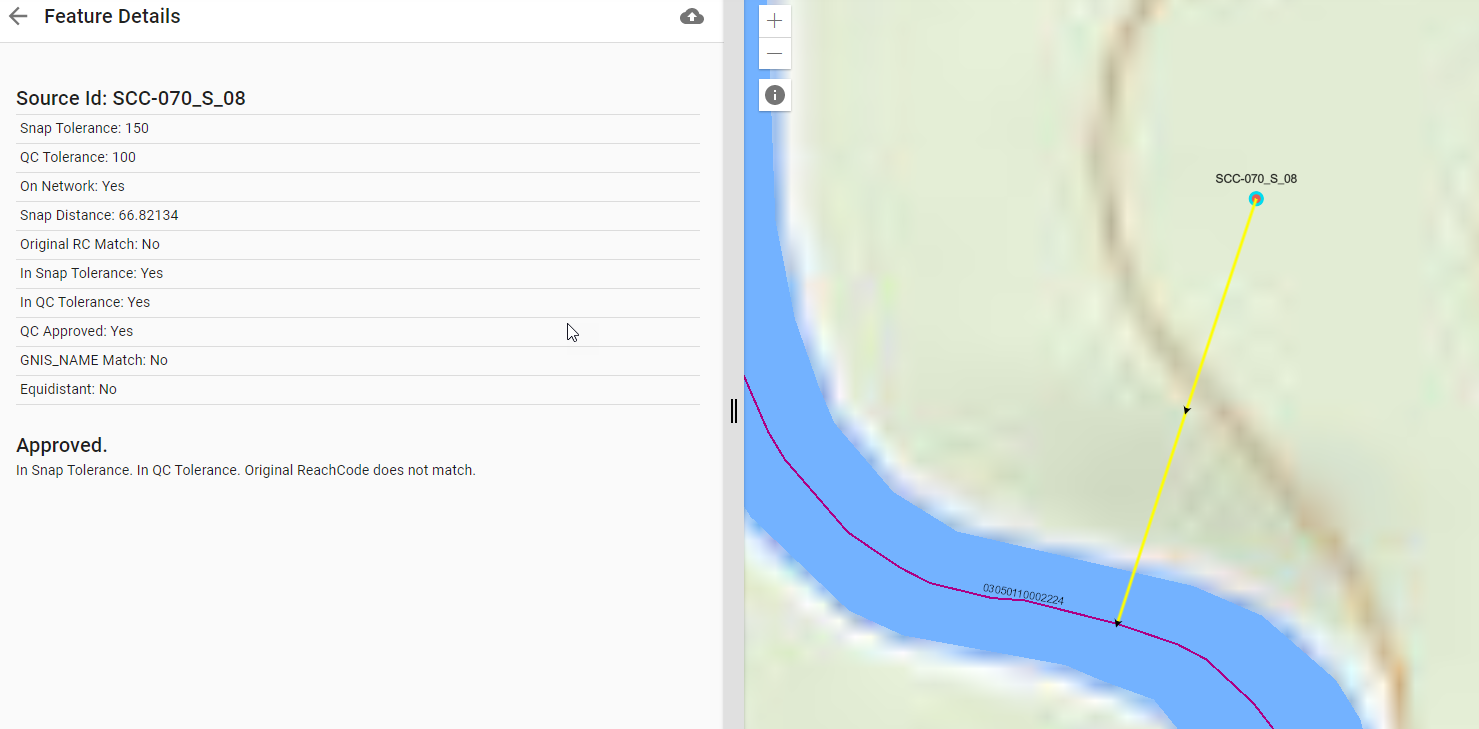
You can see details of the Batch QC result for each feature.

See also HydroAdd Point Schema.
See also Point Batch QC logic.
Publishing from HydroAdd updates the features in your service layer at AGOL. However, the results displayed in the Batch QC queue do not change after publishing. The results are essentially a static snapshot of the state of your service layer before publishing. Even when the features in the map update to new locations after publishing, results of Batch QC queue remain unchanged.
You can always run Batch QC again after publishing, but you will get different results because publishing overwrites your service layer—many of the feature will have been addressed to flowlines. To see the actual approval status of the features after publishing, you must examine the features in an editing queue (not the Batch QC queue) or use the identify tool in the map.
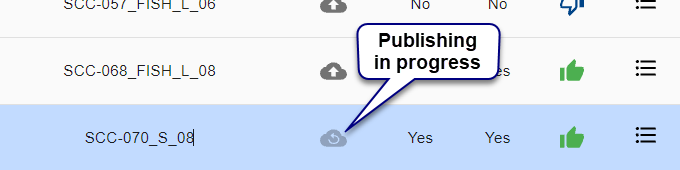
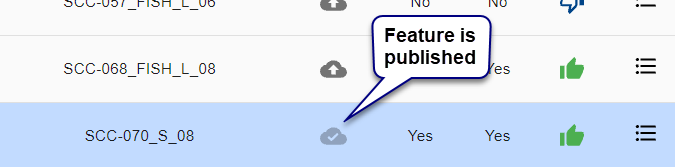
The publishing status of the entire job is displayed with job statistics in the list of all Batch QC jobs. 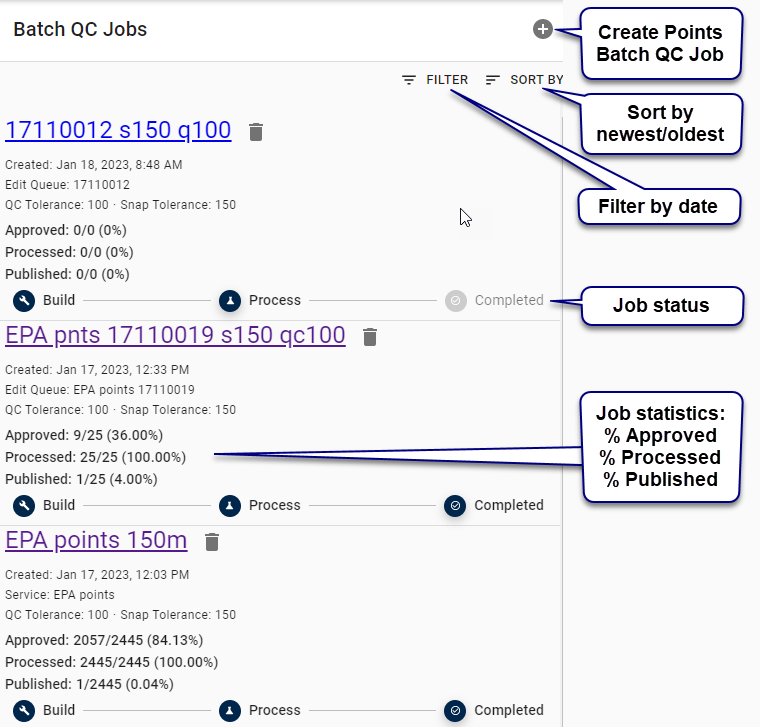
The publishing status of individual features is always shown in the Batch QC queue:
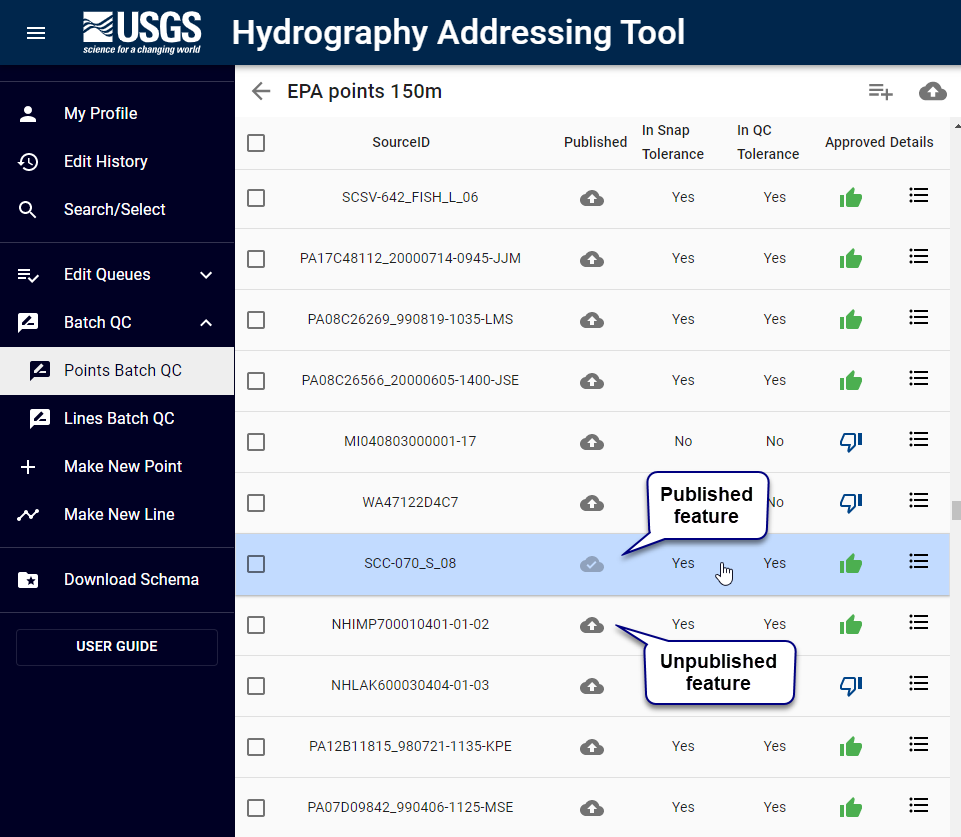
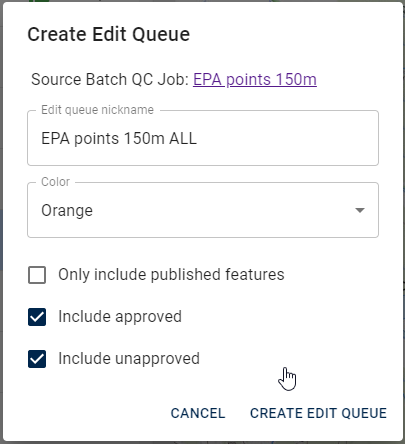
You can make queues from approved items, unapproved items, or both.
It is convenient to make a queue of only the unapproved items but publish only approved items to your service layer. Manually examining only the unapproved items in a normal editing queue can save you time on large jobs.
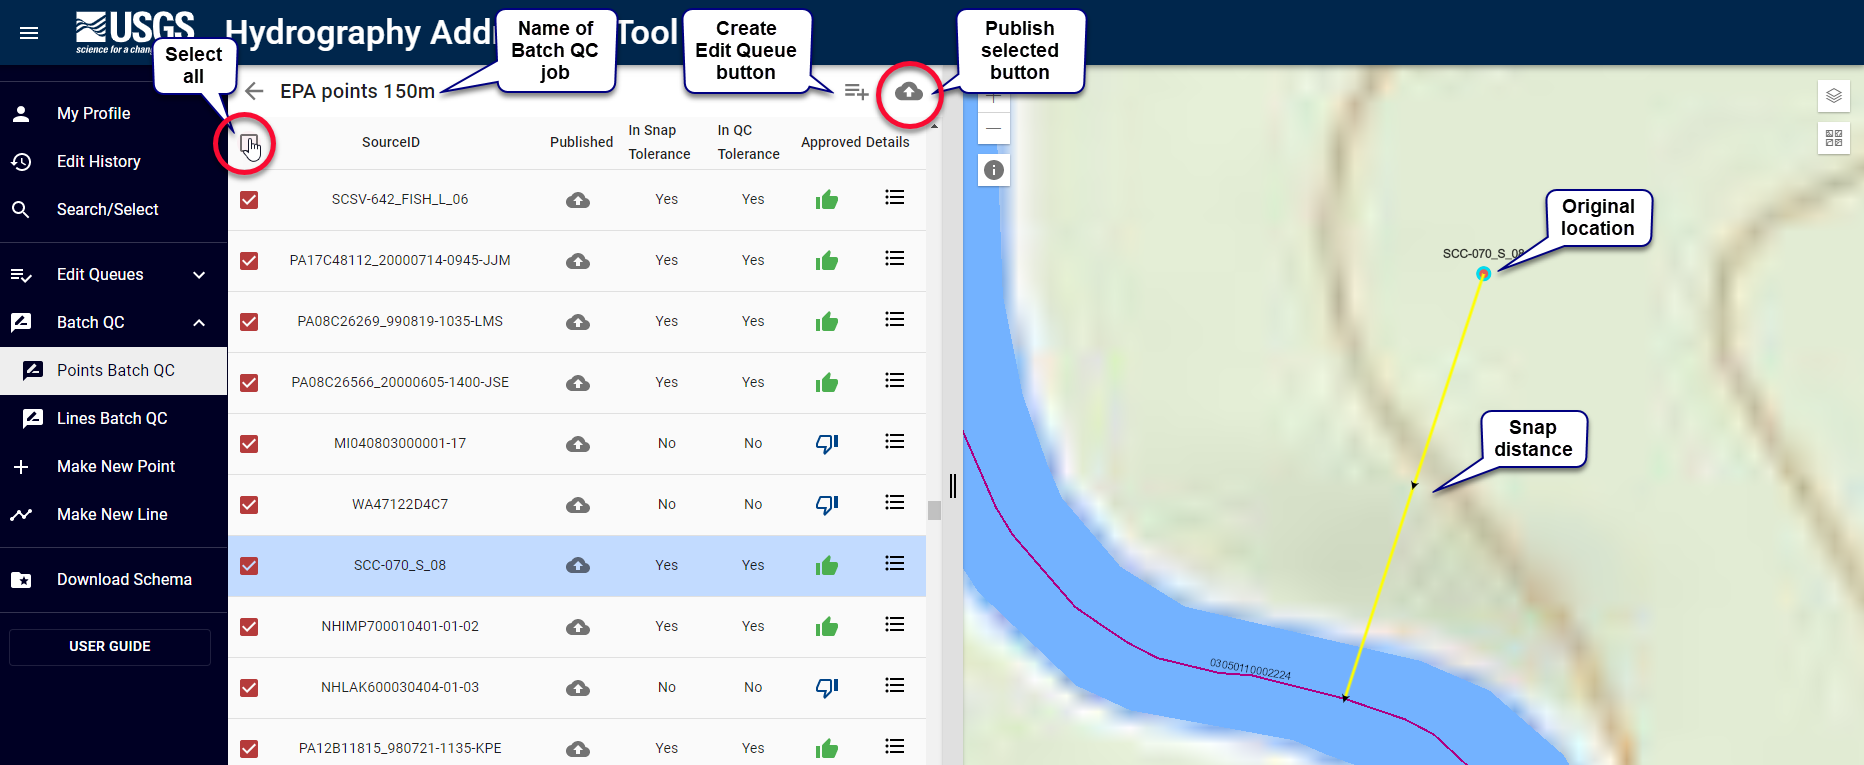
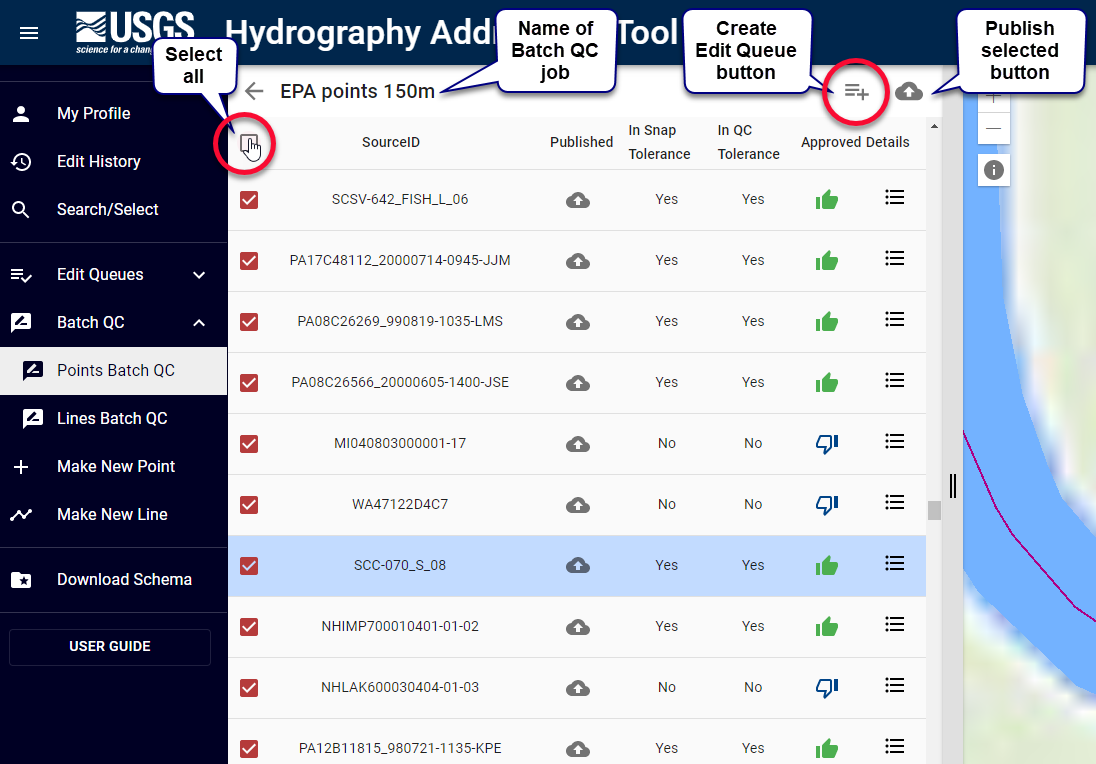
Select multiple items, or select all rows.
The maximum number of items that can be selected for publishing is 2,000.

Overview of point Batch QC Logic.
|
Case |
InSnapTolerance |
InQCTolerance |
QCApproved |
Batch QC Detail Message |
|
Point is not in snap tolerance |
NO |
NO |
NO |
Not approved: Point is not in snap tolerance |
|
Point is equidistant from two or more flowlines |
YES |
NO |
NO |
Not approved: Point is equidistant from two or more flowlines |
|
Point is in snap tolerance, |
YES |
NO |
NO |
Not approved: Point is not in QC tolerance |
|
Point is in snap tolerance, |
YES |
YES |
YES |
Approved: Point is in QC tolerance |