Edit Queues

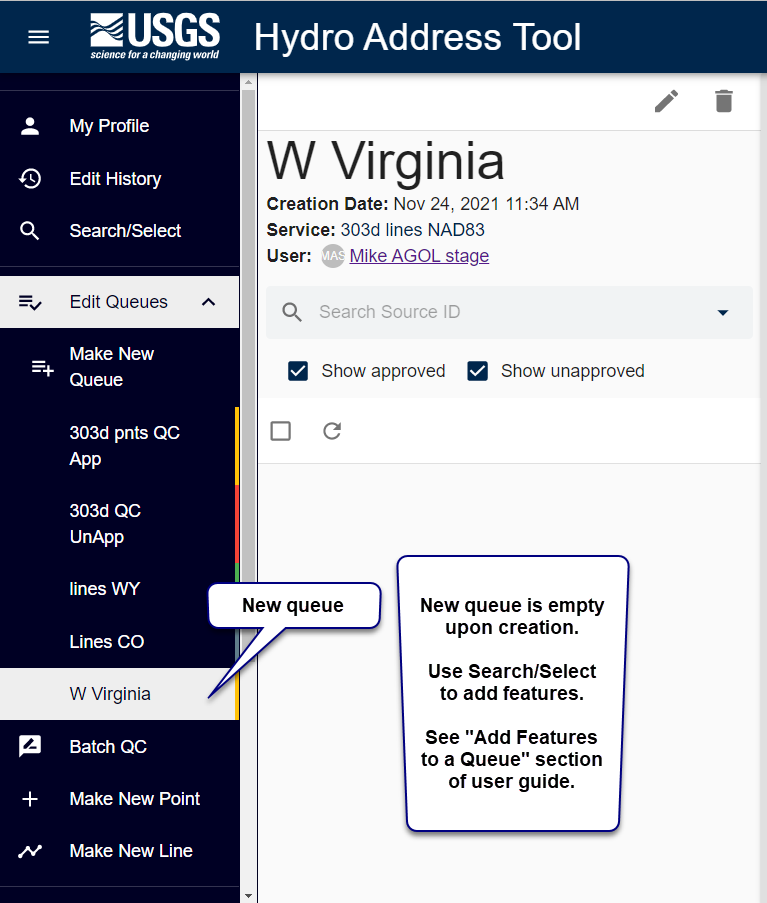
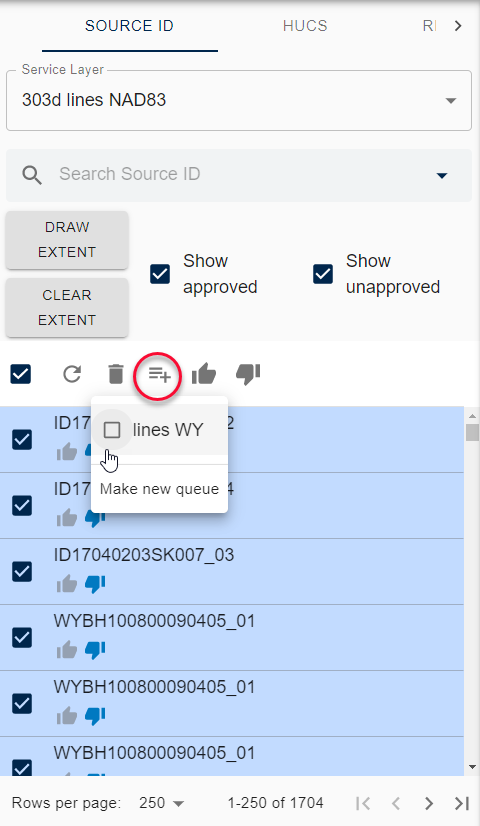
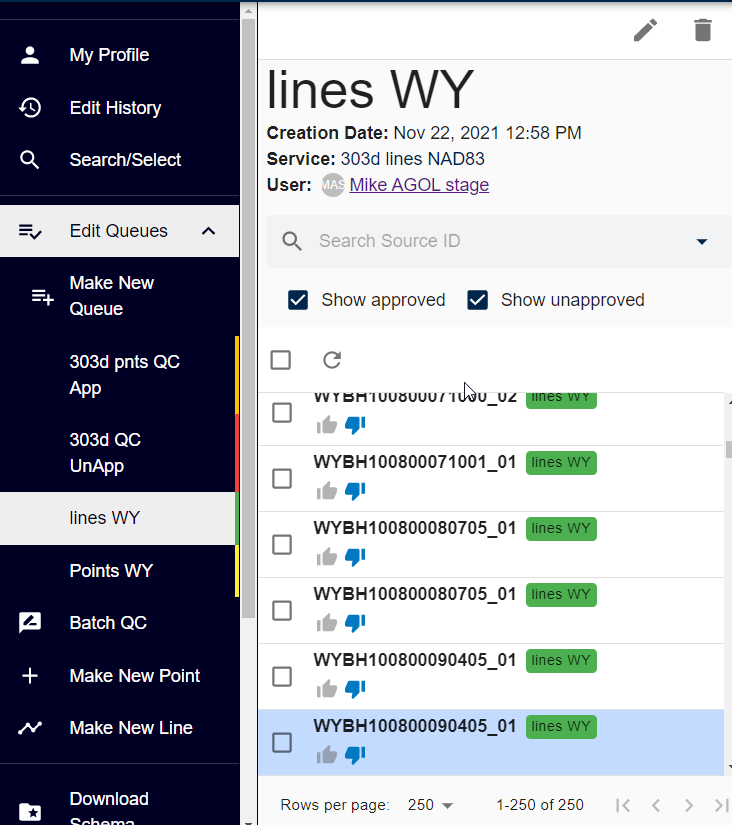
A queue is convenient way to group items in your service layer for editing. For example, you could group items in your service layer by HUC or divide the editing workload between coworkers.

Picture 1942556017

Show approved/show unapproved

The main advantage of using a queue is it drives you to unapproved features that need review.

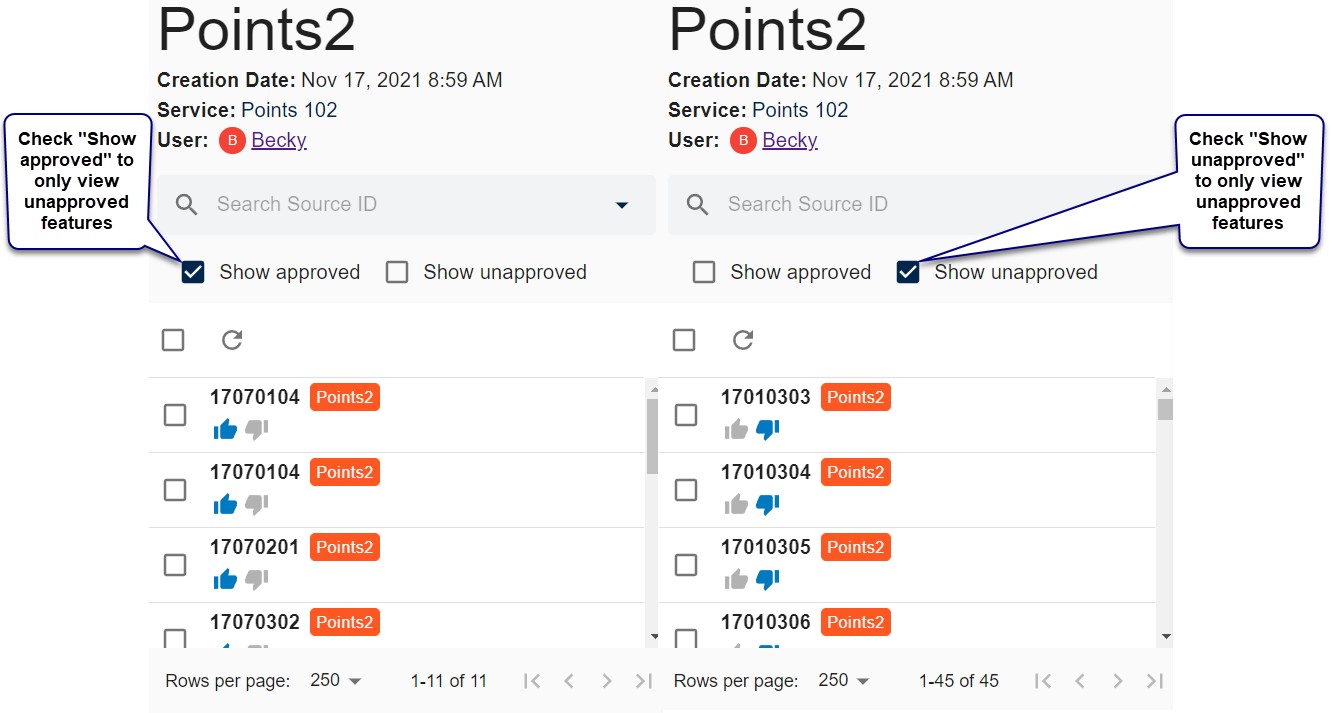
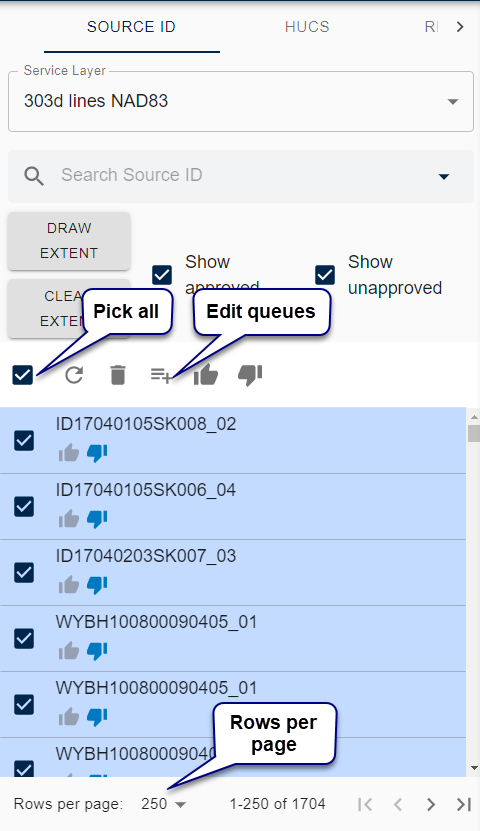
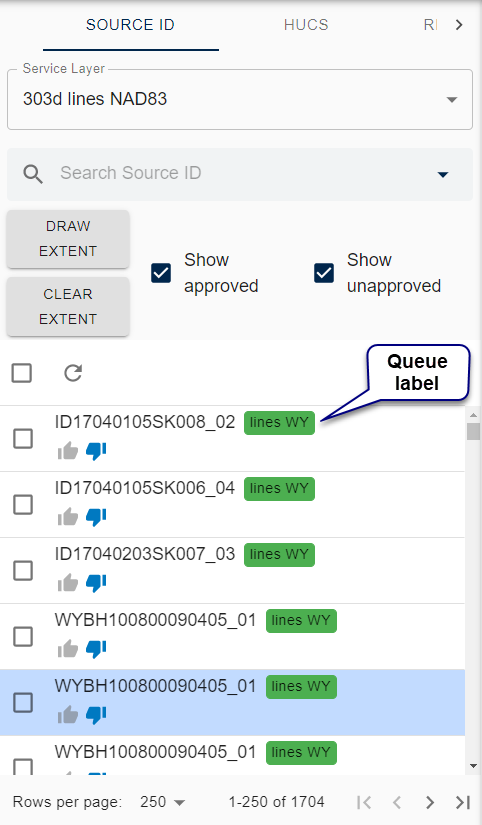
Use the check boxes to view approved items, unapproved items, or both. Both check boxes are checked by default.


Picture 1942556010 

Make a new queue

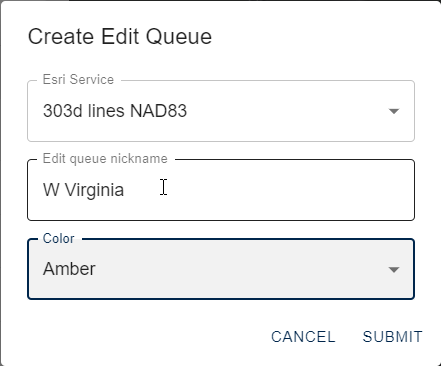
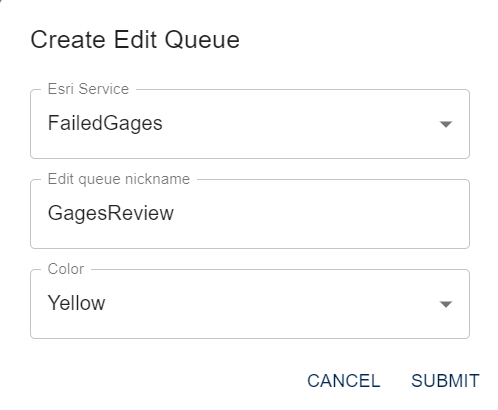
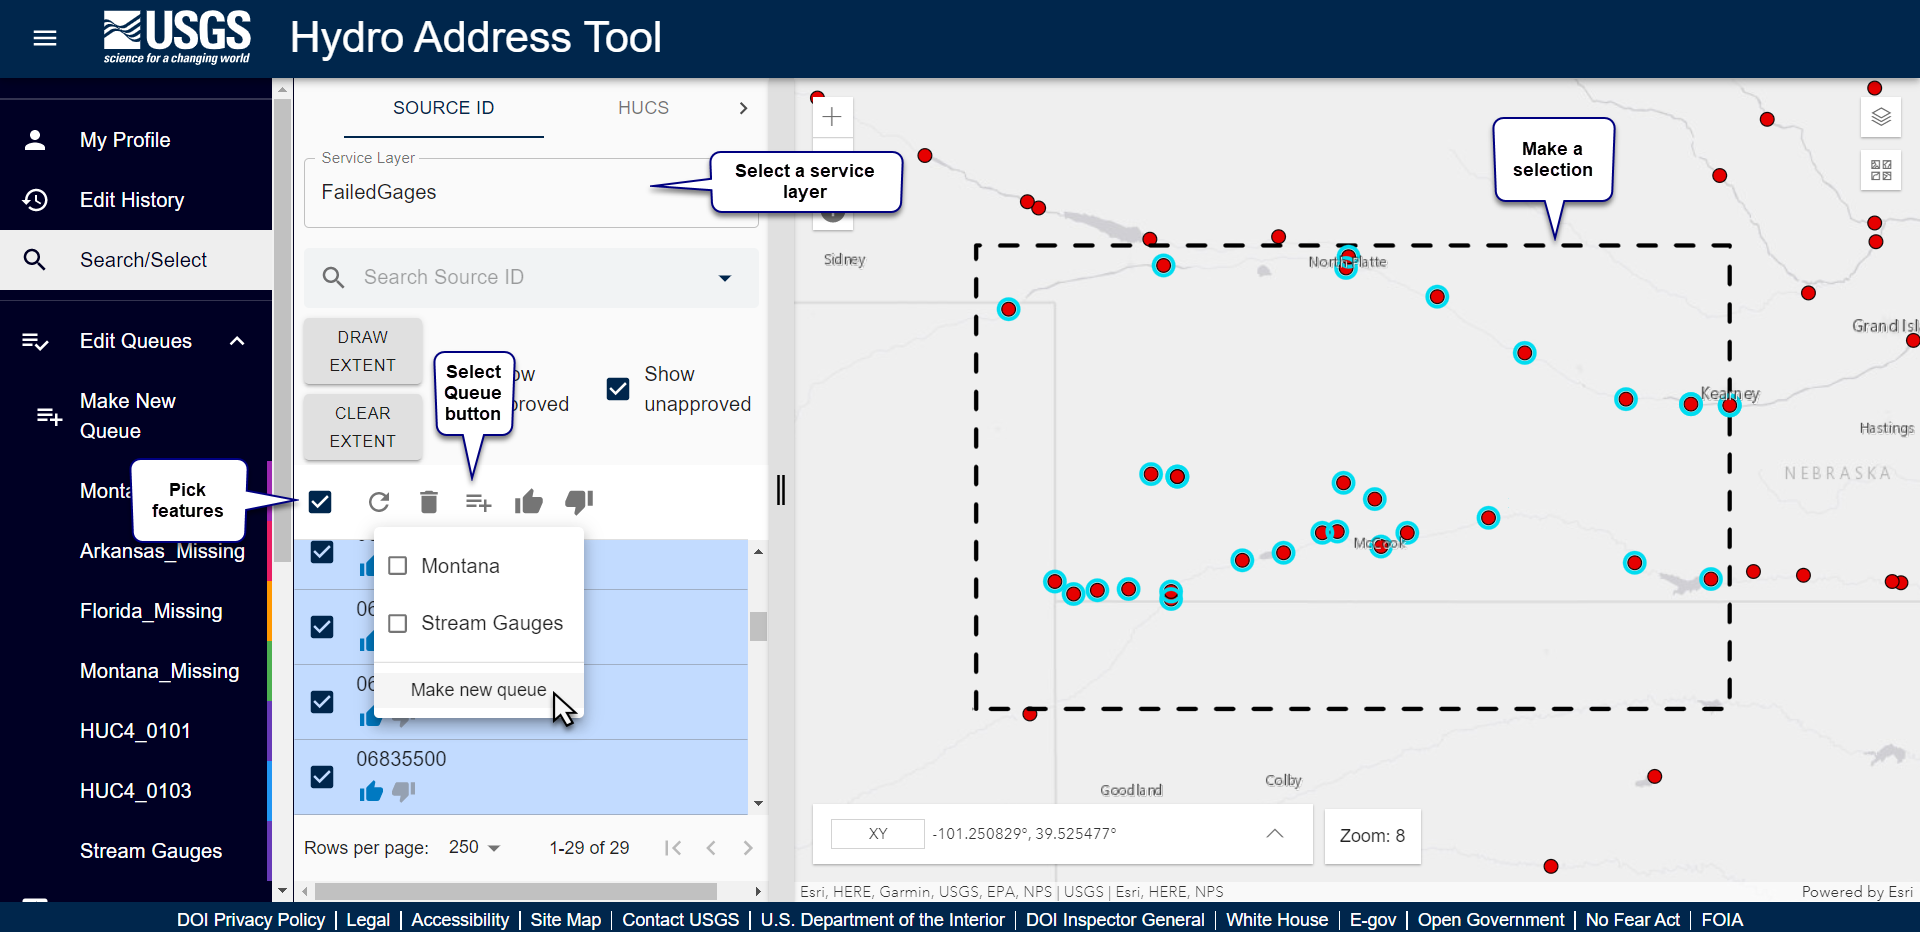
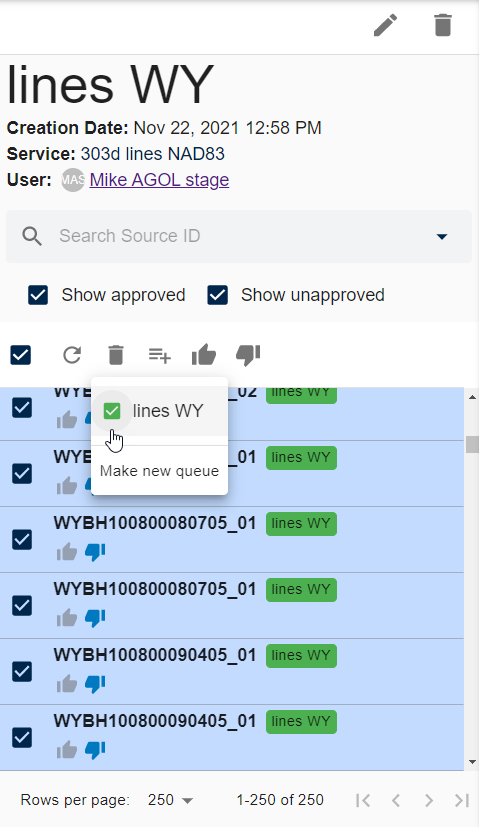
Queues can be made from Edit Queues, from a selection, or from an existing queue.

Make a new queue from Edit Queues

  1. Go to Edit Queues > Make New Queue.
  2. Create Edit Queue window appears.
  3. Enter the service URL from AGOL, queue nickname, and choose a label color.
  4. Click Submit.

    Picture 1942556053 
  5. The new queue appears in Edit Queues
    The new queue is empty upon creation.
    Learn how to add features to a queue.

    Picture 1942556054 

Make a new queue from a selection or existing queue

  1. Hover the cursor over a row of a selection or existing queue, then click the Edits Queue button.
  2. Click Make New Queue.
  3. Enter Esri Service, Edit queue nickname, and choose a queue label color.

    Picture 1942556023 
  4. Click submit.
  5. The new queue appears in Edit Queue.
    Picture 557122929 

Queue row Functions

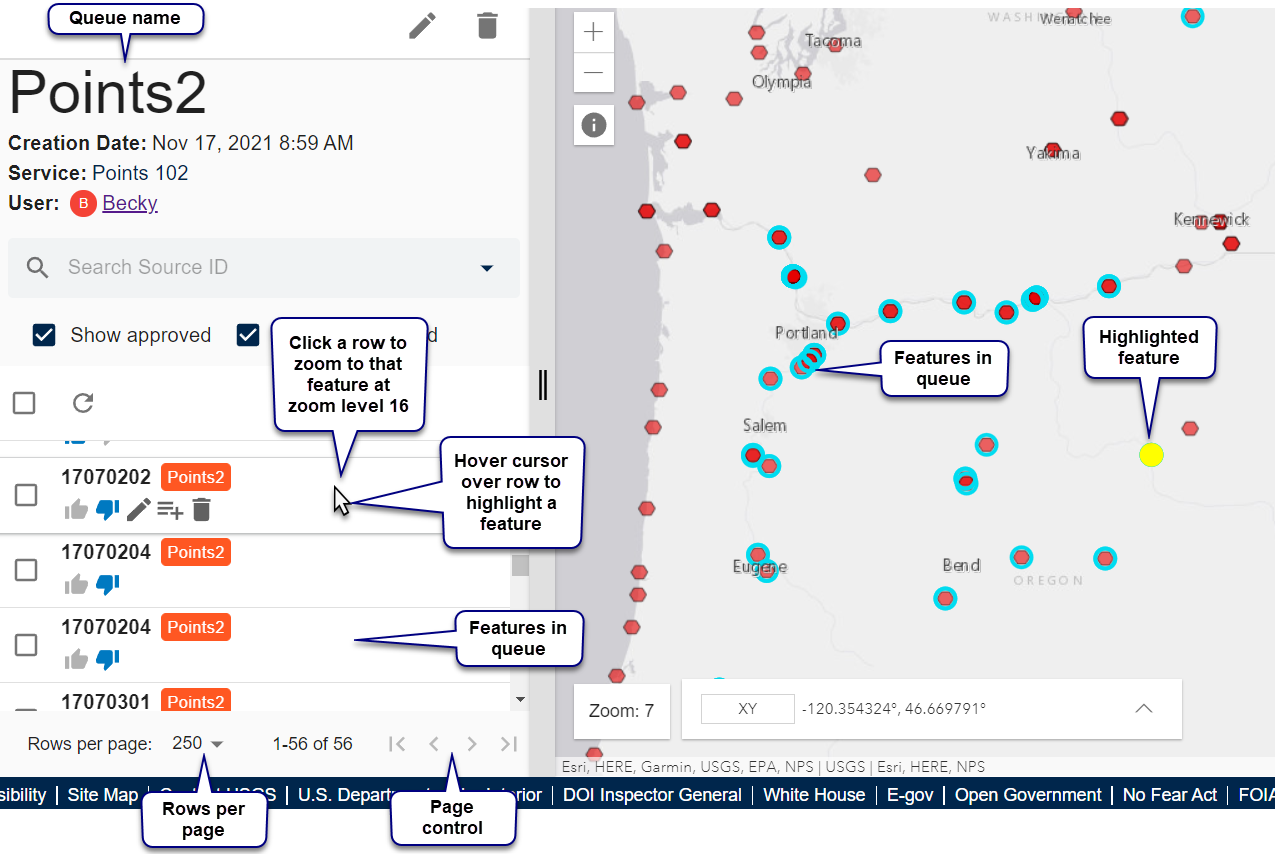
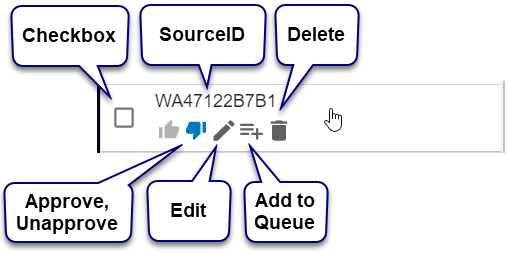
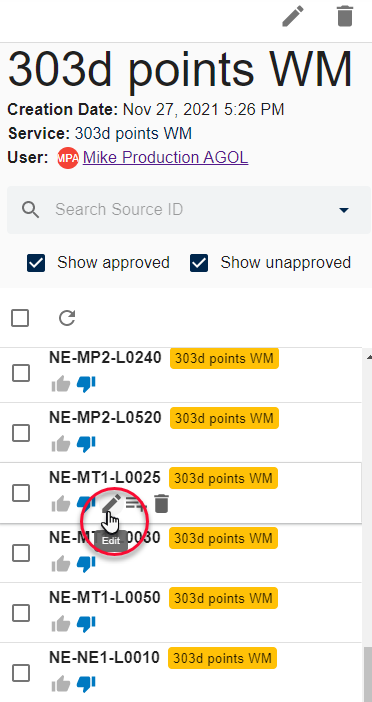
Click the row to zoom to the feature. Hover the cursor over a row to access the row buttons. Each row has a checkbox and five buttons: Approve, Unapprove, Edit, Add to Queue, and Delete.

Picture 557122933 


Queue row Checkbox

Use the Pick All checkbox to pick all rows on a page or use a row checkbox to pick single features. Only the features in the page will be picked. For example, if there are 10 rows in the Search/Select page, only 10 features will be picked. To pick more rows, increase the number of rows per page or go to the next page. Once you have picked multiple rows, you can delete, approve/unapprove, or add to/remove from a queue.

Picture 1942556024 

Queue row SourceID label

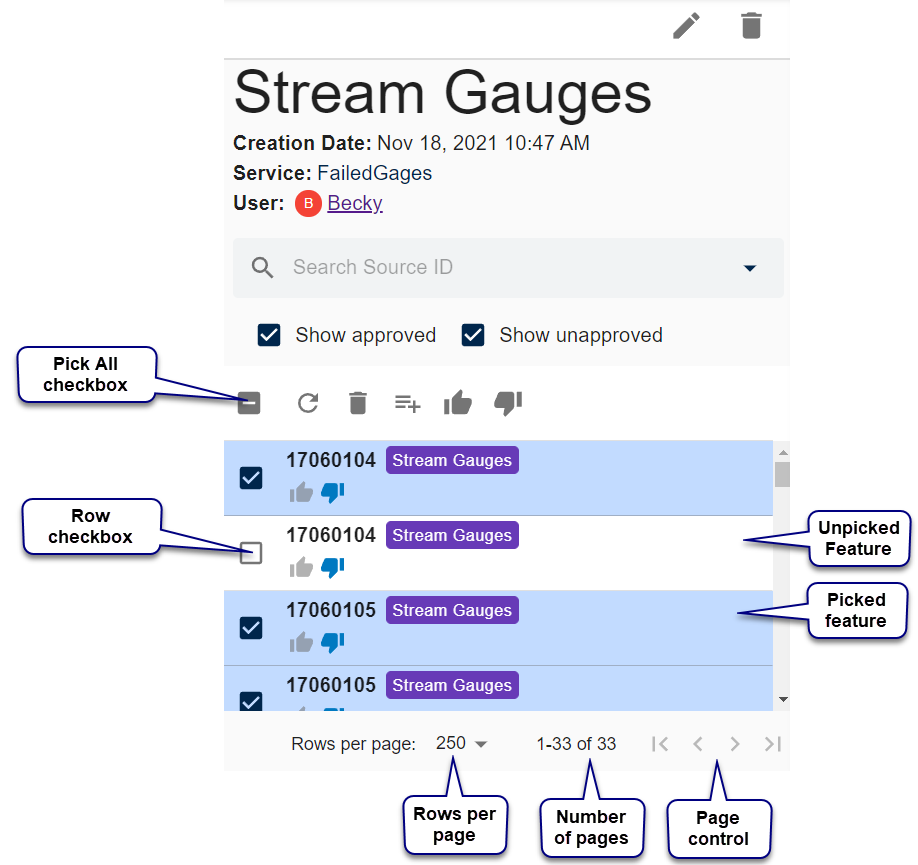
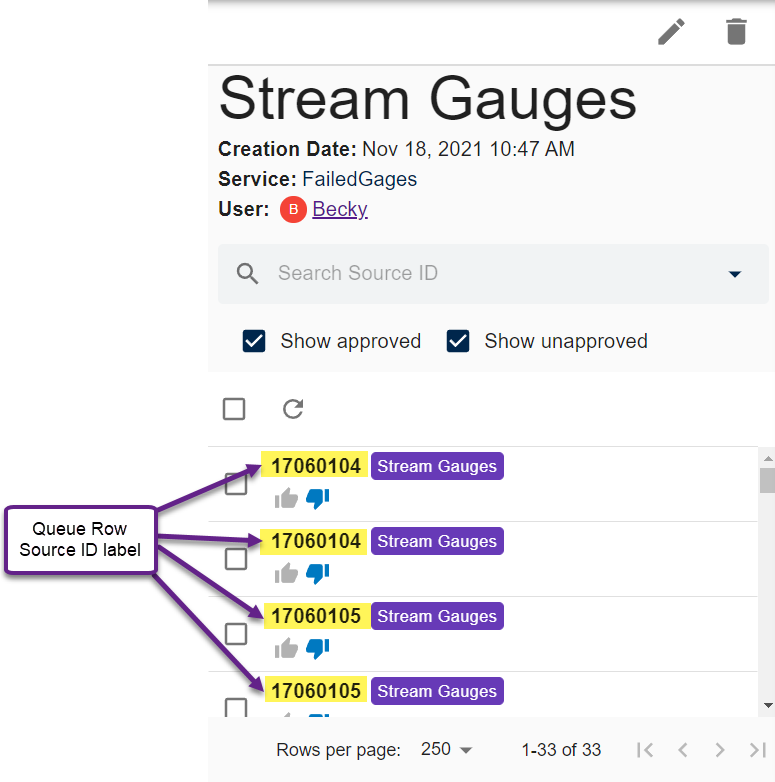
HydroAdd requires a SourceID as a unique identifier for all features in your service. Rows in a selection or queue show the SourceID. You normally assign SourceIDs to features in your service during schema preparation in ArcGIS Pro. If a feature does not a have a SourceID, HydroAdd requires you to enter one to save your edits. Likewise, new features must have a SourceID to save.

Picture 1942556028 

Queue row Delete button

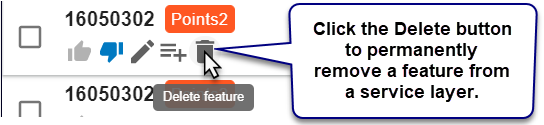
Delete permanently removes a feature from your service layer. To delete a single feature, hover the cursor over a row and click the delete button.

Picture 1942555997 

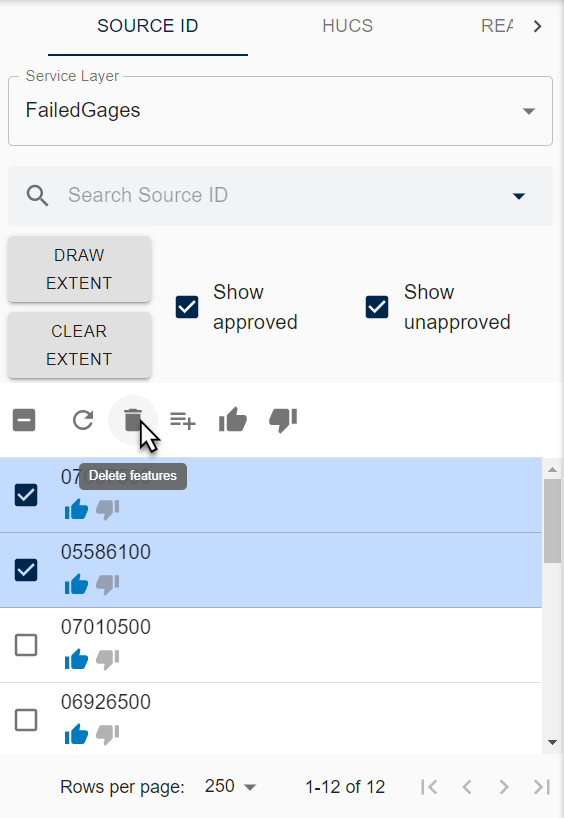
To delete multiple features, use the checkbox to pick the features you want to delete.

Picture 947586049 

Queue row Approve, Unapprove buttons

Features have two statuses: approved and unapproved. Click the thumbs up button to approve a feature. Click thumbs down button to unapprove.

Picture 557122934 

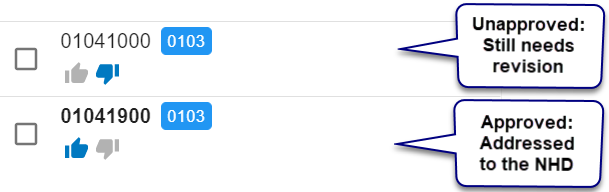
In general, approved features are addressed to the NHD, which means they have a ReachCode and Measure. However, HydroAdd does not strictly require approved features to be addressed. It is possible to approve features that have not been addressed. HydroAdd will warn you if you approve or save a feature that has not been addressed but does not disallow it.

Picture 3 

Queue row Edit button

Click the edit button to edit a feature. When you click the edit button, the editing pane opens, and the editing crosshair cursor appears on the map.

Click a row in a selection or queue to zoom to the feature at level 16. This allows you to inspect the feature in the map before opening it for editing.


Learn more about Editing.


Add Features to a Queue

  1. Pick a single item from a selection or existing queue, or pick multiple items using the Pick All checkbox.
    1. NOTE: The Pick All check box selects only the rows in the page
    2. You many need to increase the number of items per page to ensure all the features in your selection are added to the queue.
    3. Queues can have more than 2,000 features, but this is not recommended.
  2. Click Edit Queues button.

    Picture 1942555900 
  3. From the popup, pick an existing queue or make a new queue.

    Picture 1942555901 
  4. The queue label appears in the rows.

    Picture 1942555902 
  5. Popup, lower right, indicates features are added to the queue.

    Picture 1942555903 
  6. Click the queue name in the far-left pane to view the items in the queue.
    Picture 1942555914 

Remove features from a Queue

  1. Click a queue name in the far-left pane to view the items in the queue.
  2. Pick a single item from the queue, or pick multiple items using the Pick All checkbox.
    1. NOTE: The Pick All check box selects only the rows in the page
    2. You many need to increase the number of items per page to ensure all the features in your selection are added to the queue.
  3. Click Edit Queues button.
  4. A popup appears showing available queues.
  5. Uncheck the queue.

    Picture 1942555956 
  6. The queue label disappears from the rows of the picked features.
  7. The popup, lower right, indicates the features are removed from the queue.

    Picture 1942555945 

Delete a queue

Deleting a queue does not delete any features from the service layer—it just deletes the queue from HydroAdd interface.

This action cannot be undone. If you accidentally delete a queue, you will need to make a new queue and add feature to it again.


  1. Click a queue name in the far-left pane to view the items in the queue.
  2. Click the Delete Queue button at the top of the queue pane
  3. The queue is deleted.

Picture 1942555968 

Update a queue label

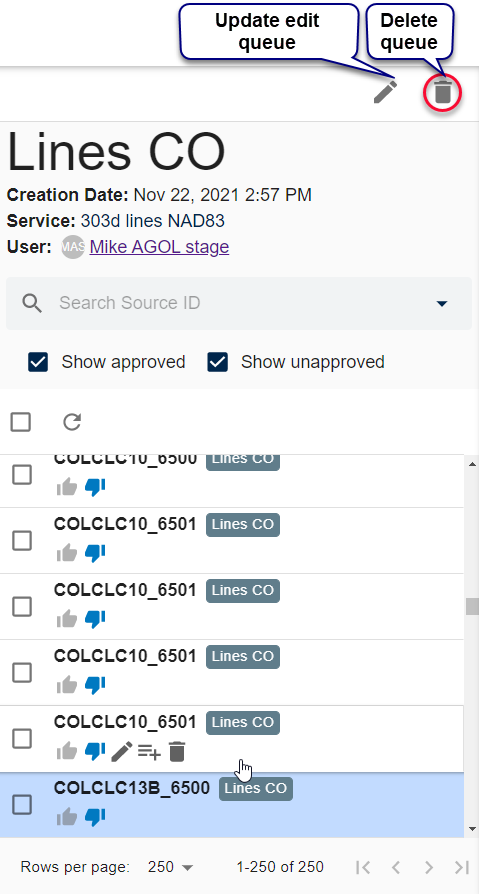
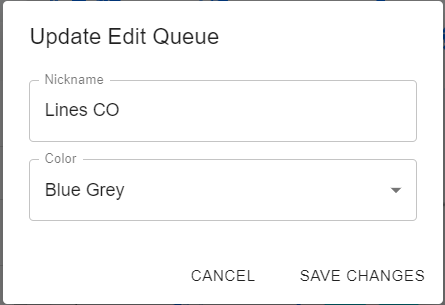
You can change the name of a queue and label color any time. This does not affect any of the features in the queue.

  1. Open the queue.
  2. Click Update Edit Queue button at the top of the queue pane.

    Picture 1942555995 
  3. The Update Edit Queue window pops up. Update the label name and color as needed.

    Picture 1942555965