Editing Points
- Open a point feature for editing.
- The selected point appears in the map with cyan halo.
- At zoom level 14 or greater, the editing crosshair cursor appears in the map.
- The editing pane appears, showing the HydroAdd point schema.
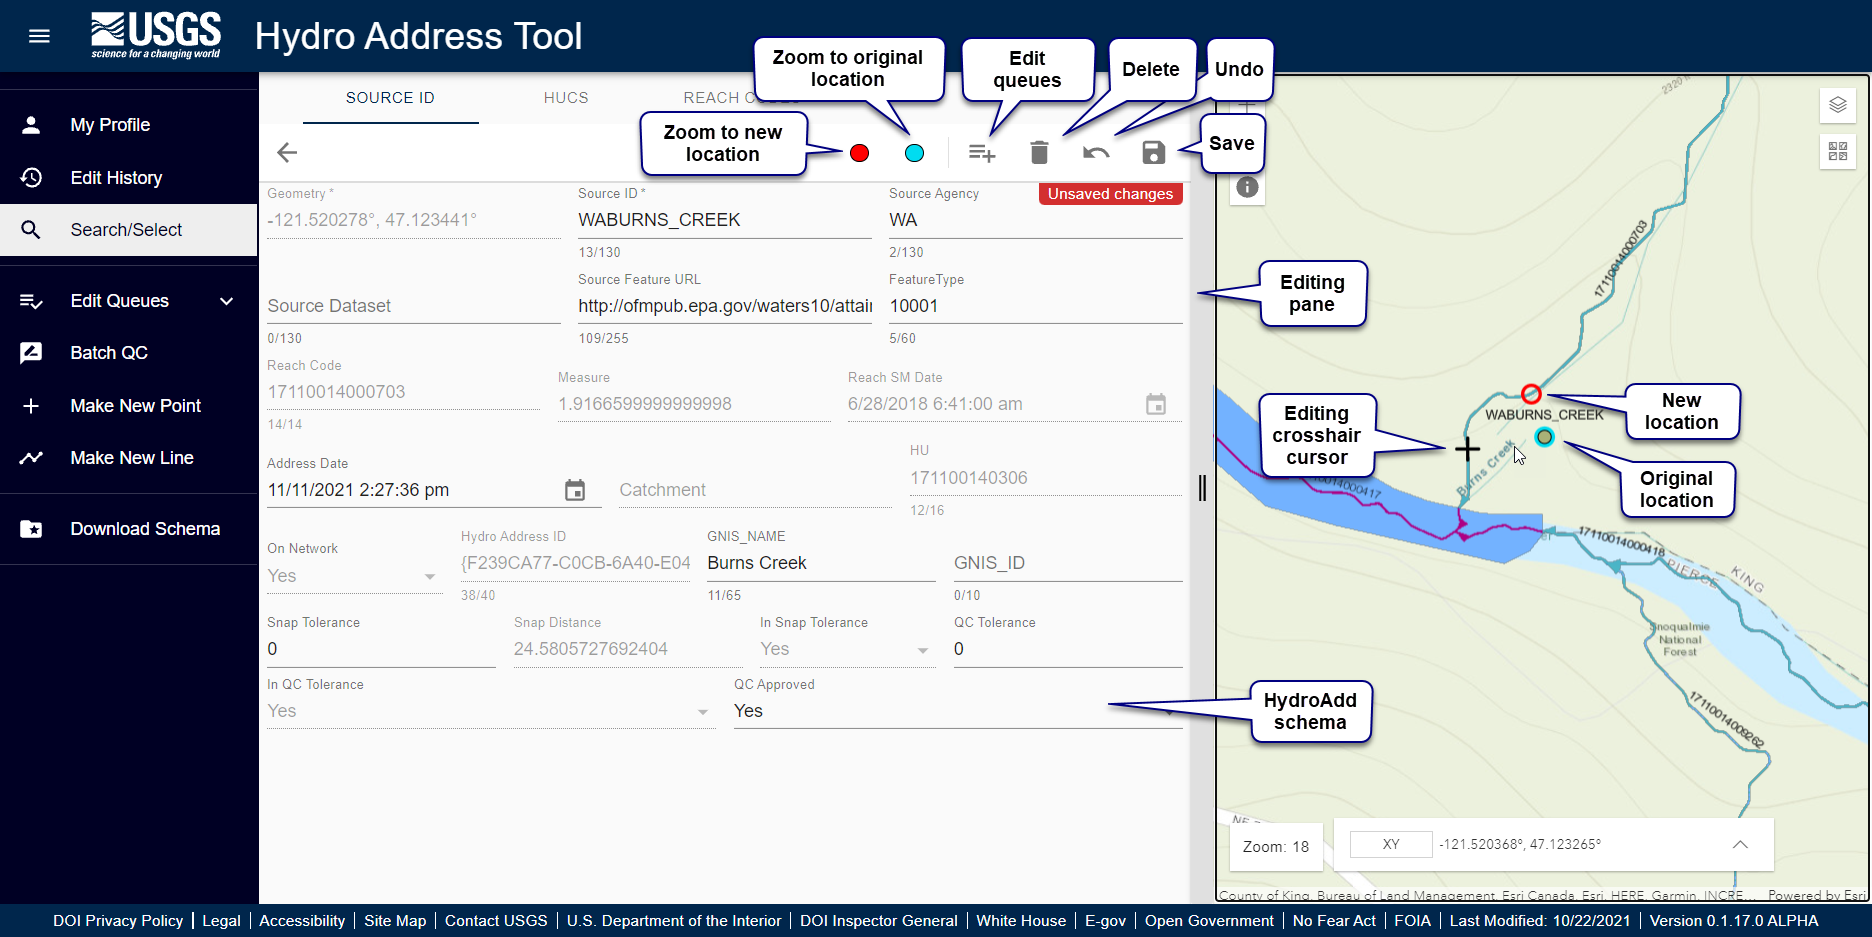
- Position the edit crosshair cursor on a flowline; Click once.
- A red halo appears at the new location.
- HydroAdd updates the ReachCode, Measure, GNIS_NAME, GNIS_ID, HU, Catchment, Address Date, SnapDistance, QCApproved, and other QC fields.
- Adjust the location of the point by clicking again. You can adjust the location as many times as necessary. The location is not final until you save.
- Update the SourceID, SourceDataset, SourceFeatureURL, and FeatureType.
- SourceID cannot be Null. If SourceID is Null, the item cannot be saved.
- Click the save icon in the upper right side of the editing pane.
- Confirmation popup indicates feature is saved.
Learn more about editing at Editing Overview.