Prepare your Data for the HydroAdd Tool
To edit your data with HydroAdd, there are three steps.
- Put your data into the HydroAdd schema.
- Publish your data as a web layer at ArcGIS Online with ArcGIS Pro.
- Add the web layer to HydroAdd tool.
Step 1: Put your data into the HydroAdd schema
To edit your data with HydroAdd, it must in the HydroAdd schema.
- Scrub your data.
- Remove any non-ASCII or HTML tags from your attributes. HydroAdd cannot save features with HTML tags or non-ASCII characters as attributes.
- Long lines, greater than 900 vertices, cause Lines QC to freeze. Use the Esri Dice tool to reduce the size of lines to fewer than 900 vertices.
- Single part lines cannot be QC'd. Use Esri Multipart to Singlepart geoprocessing tool on you data before you run lines
QC.
- Download the HydroAdd empty schema from the HydroAdd tool.
- Save the zip file; unzip it.
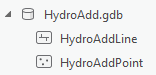
- The file is an Esri geodatabase. It contains two empty feature classes in the Web Mercator projection:
HydroAddLine and HydroAddPoint. The HydroAddPolygon feature class will be added soon.
- NOTE: Web Mercator (WKID 3857) is the recommended projection for HydroAdd service layers.
- NAD83 is also acceptable, although you would need to reproject downloaded HydroAdd feature classes.
- If other projections are used, Editing and Batch QC may break or behave unpredictably.
- Learn about projecting between Web Mercator and NAD83.
- See HydroAdd Data Schema for field descriptions.
- Add any fields you need to the HydroAdd schema.
- HydroAdd is indifferent to any additional fields you add to the core schema. You can add as many fields as you want. However, do not remove any of the core HydroAdd fields. This will break editing.
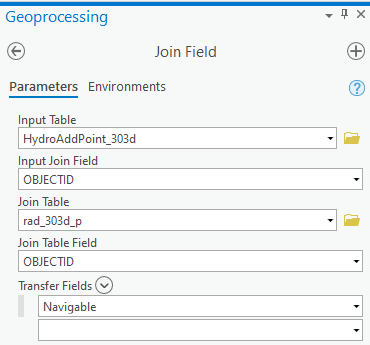
- Use the Join Field tool to add fields to the HydroAdd schema. You can add single or multiple fields with the Join Field tool. Use OBJECTID as the join field.
- See Join Field (Data Management)—ArcGIS Pro | Documentation to learn more.
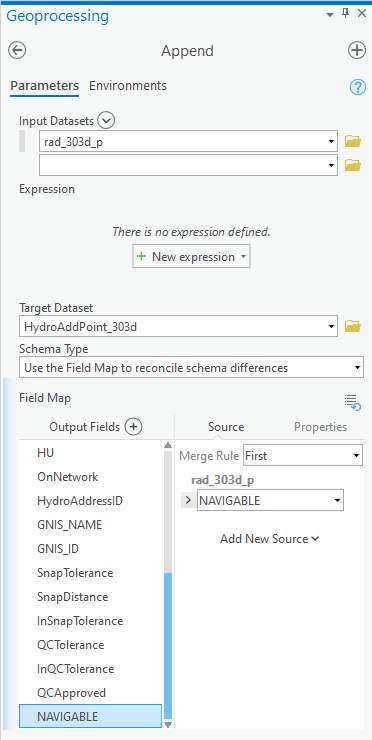
- Append your data to the empty schema with the Append tool.
- Assign a unique identifier to the SourceID field during this step. HydroAdd requires a SourceID as
a unique identifier for all features in your service. See also Search/Select row SourceID label.
- Set “Schema Type” to “Use the Field Map to reconcile schema differences.”
- See Append (Data Management)—ArcGIS Pro | Documentation to learn more.
Step 2: Publish your data as a web layer at ArcGIS Online from ArcGIS Pro
To edit your data with HydroAdd, you must publish it as a web layer at ArcGIS Online (AGOL). Follow the instructions here to publish your data as a web layer in ArcGIS Online. See Introduction to sharing web layers—ArcGIS Pro | Documentation to learn more about web layers.
Create an AGOL Group
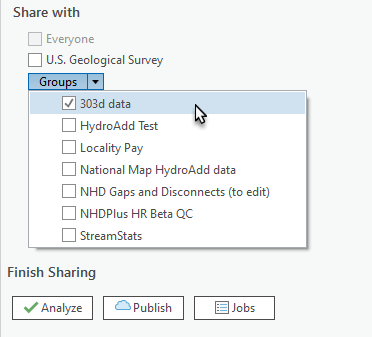
Your web layer must reside in an AGOL Group. Groups are where you control group membership, data visibility, and editing rights. HydroAdd honors these settings to protect your data.
- At your AGOL account, go to Groups.
- Click Create group.

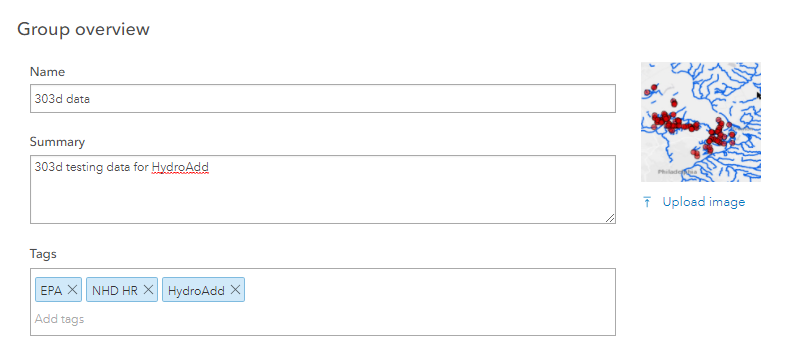
- Enter the Group overview information.
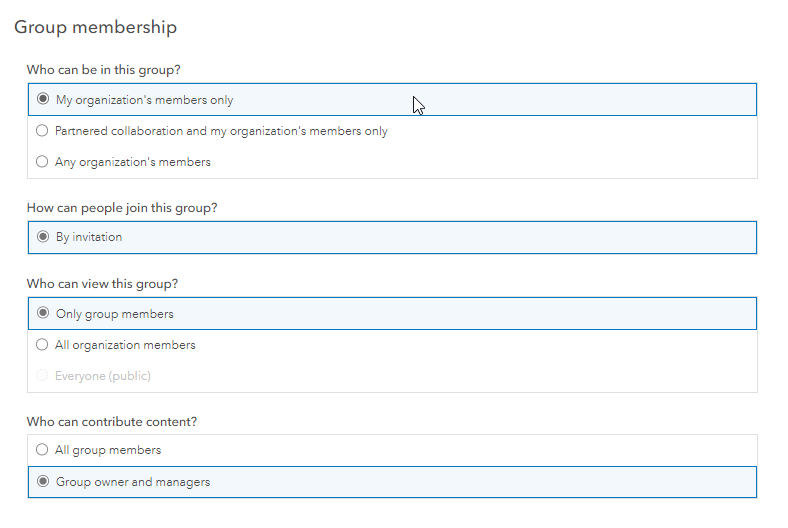
- Enter Group membership information.
These settings control group membership, group visibility, and who can contribute content. Choose membership settings that are appropriate for your group. See Manage hosted feature layer editing to learn more controlling who can edit web layers at ArcGIS Online.
- Save settings. The group is created.
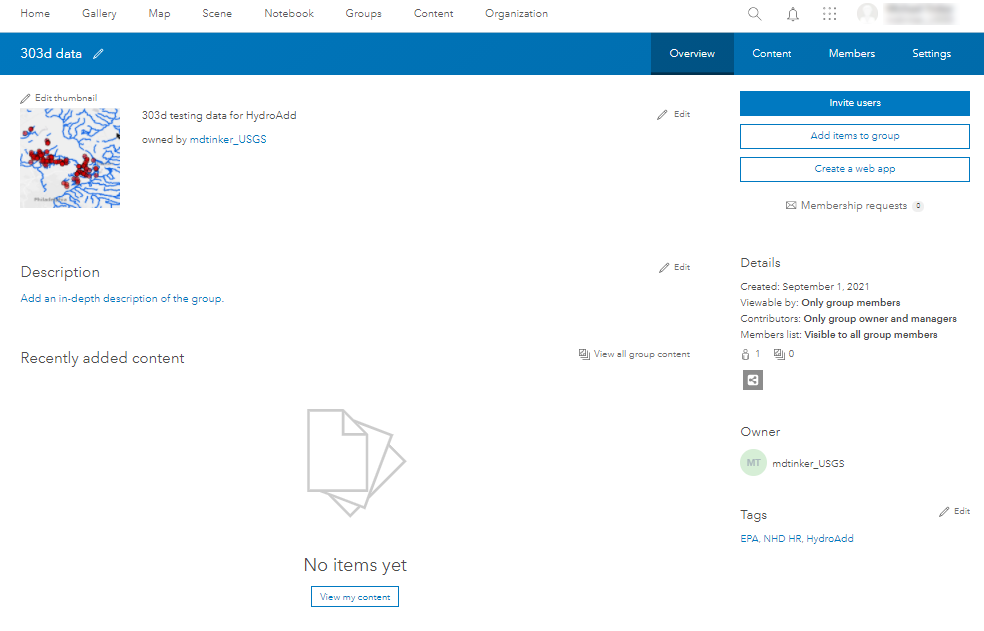
- Add users to the group.
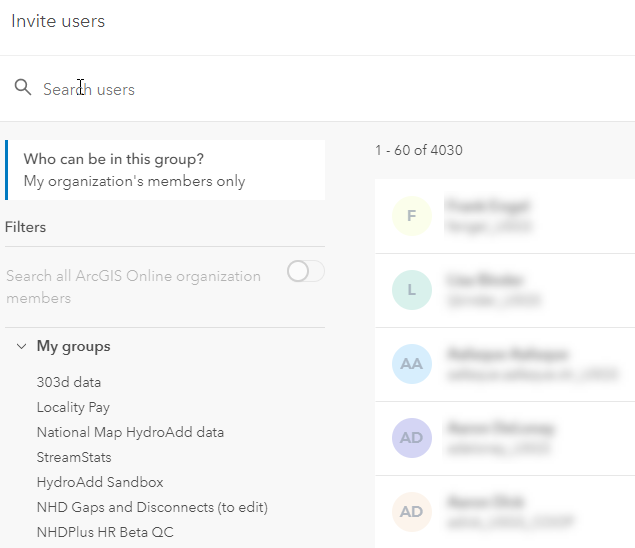
- Users who are added to a group get a notice in AGOL.
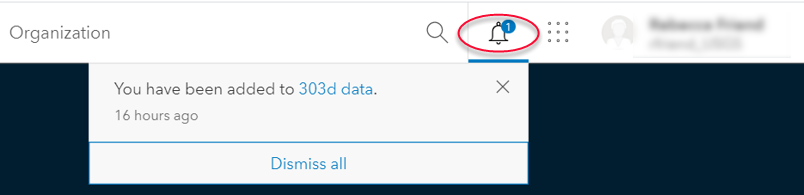
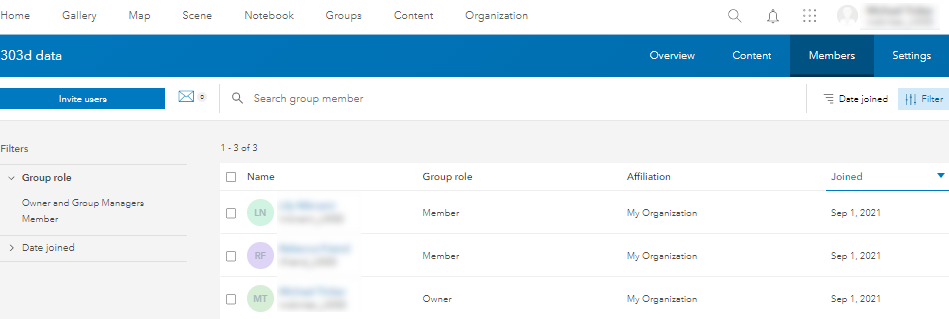
- Click Members to see all members included in the group.
Add data to the group
Once you have created a group in AGOL and added members, you can add content to the group.
- Prepare a map in ArcGIS Pro. Set the symbology and order the layers as you want to see them in AGOL.
- For point symbology, we recommend about 10-point dots with bright colors. Transparency is also helpful, about 40%, as it allows you to see the map and flowlines through the point feature.
- For line symbology, we recommend about 3-point lines with bright colors that stand out against the NHD flowlines. Very dark colors are not recommended, as they obscure the SourceID label.
- When your map is ready, publish it as a web layer.
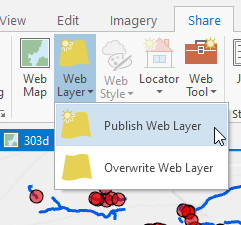
- Enter information appropriate to your web layer, including Name, Summary, and Tags.
- “Layer Type” must be “Feature”.

- Add the web layer to the appropriate group.
- ArcGIS Pro notification of successful publication.

- At AGOL, confirm your map is added to the group.
You can add as many maps to a group as you wish.
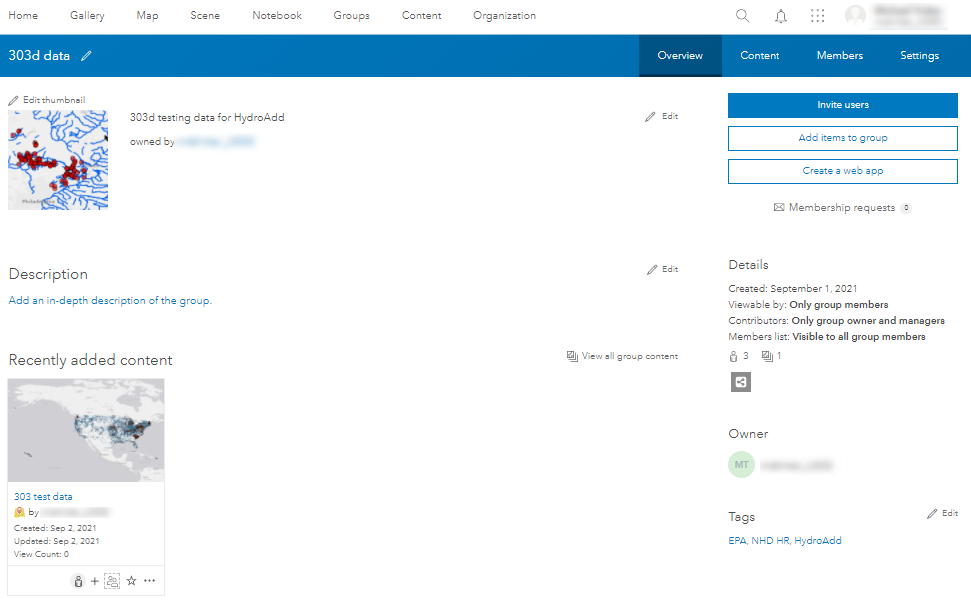
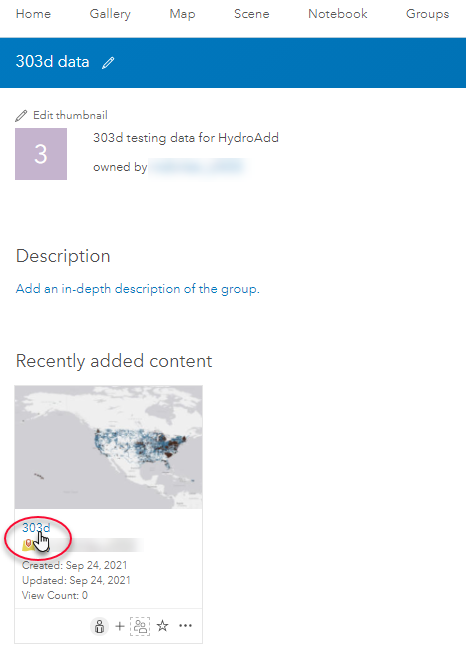
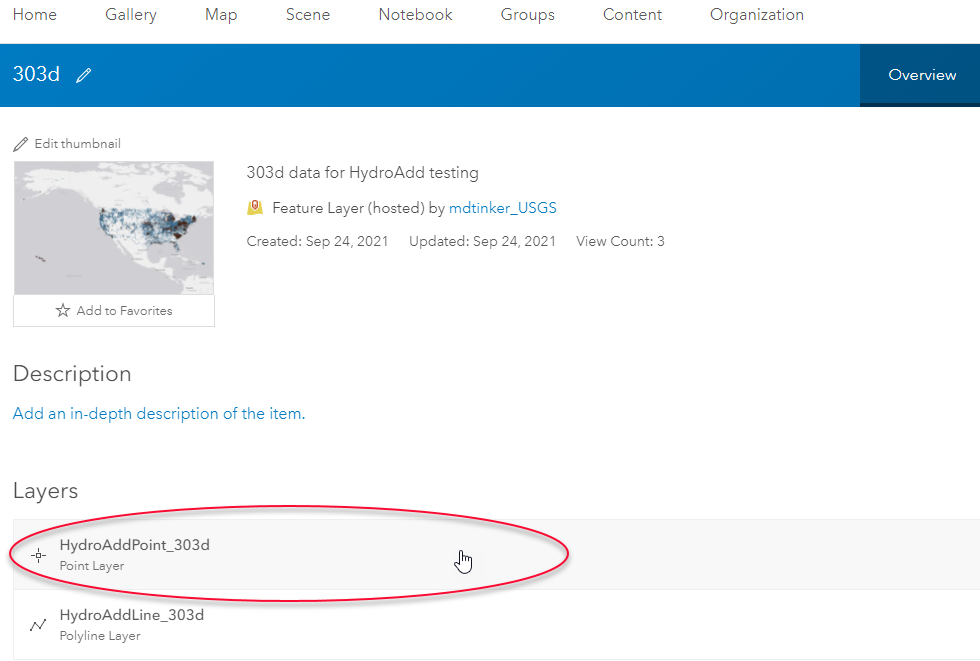
- Click the name of the map to see the overview
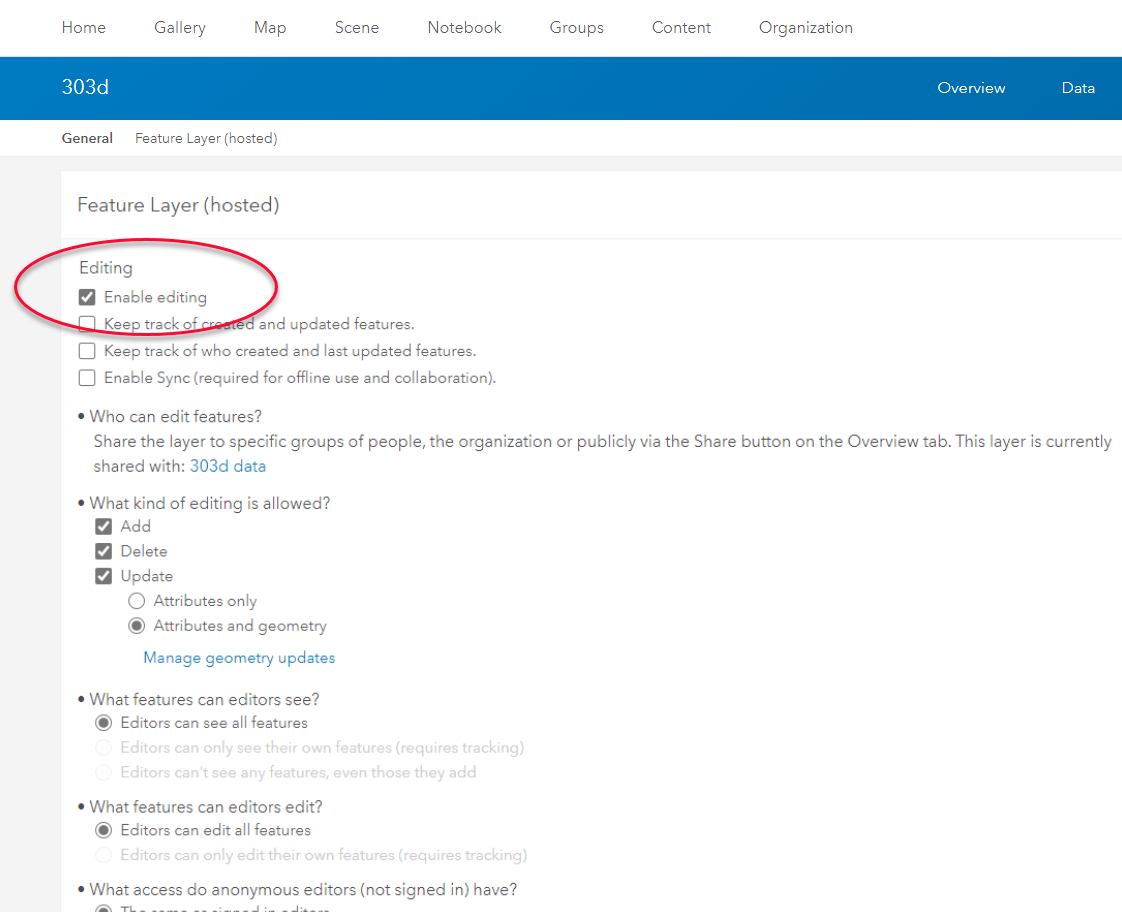
Enable editing of the service layer
- From overview, click the name of the map.
- From the item page, click Settings.
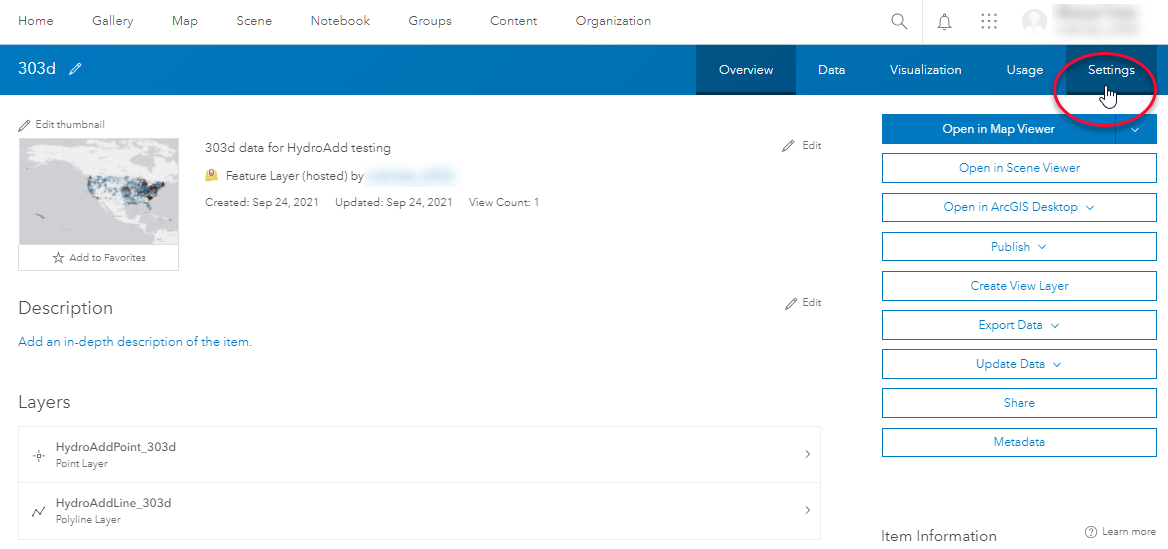
- From the item settings page, click Enable editing.
Step 3: Add the web layer to HydroAdd tool
- From the item page, click a layer.
- From layer details, copy the URL.
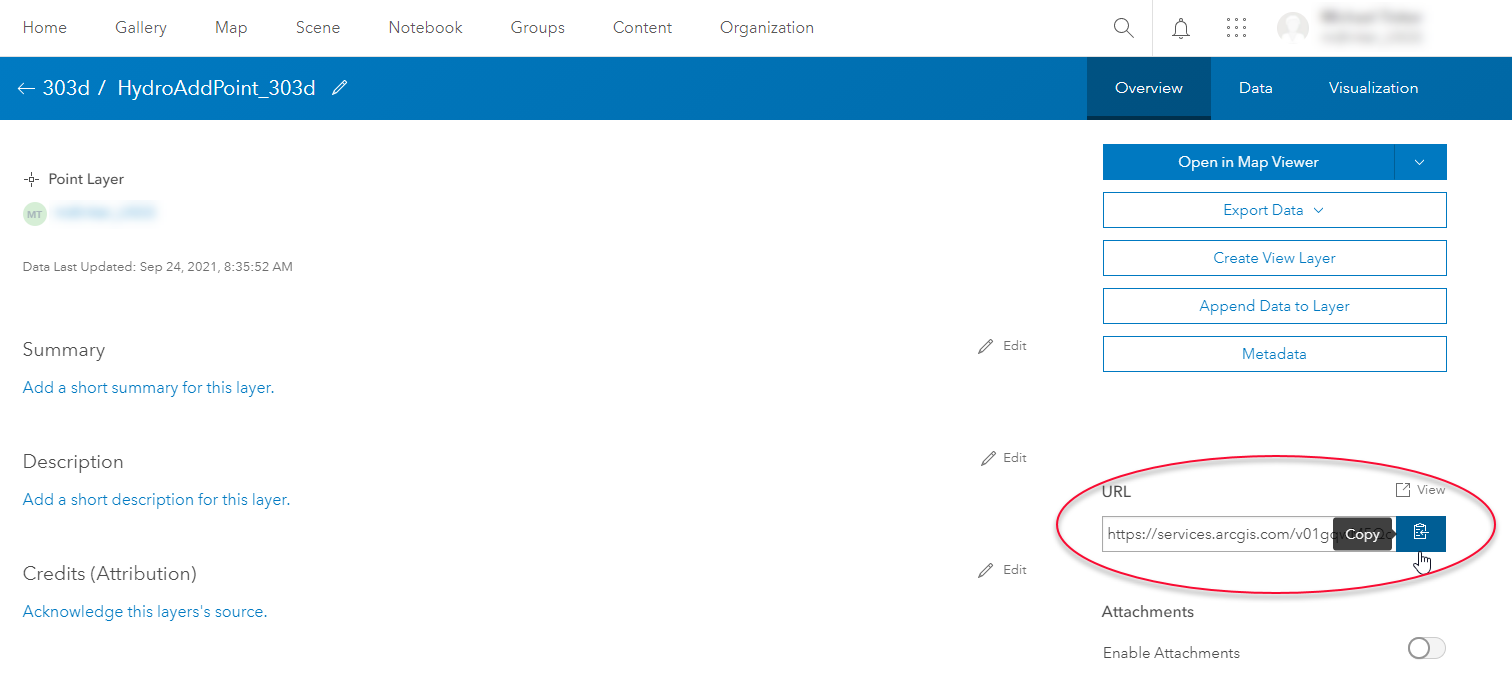
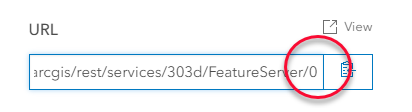
- Make sure the URL to the web layer has an index number. HydroAdd won't work properly without the index number. This is the final number at the end of the URL:
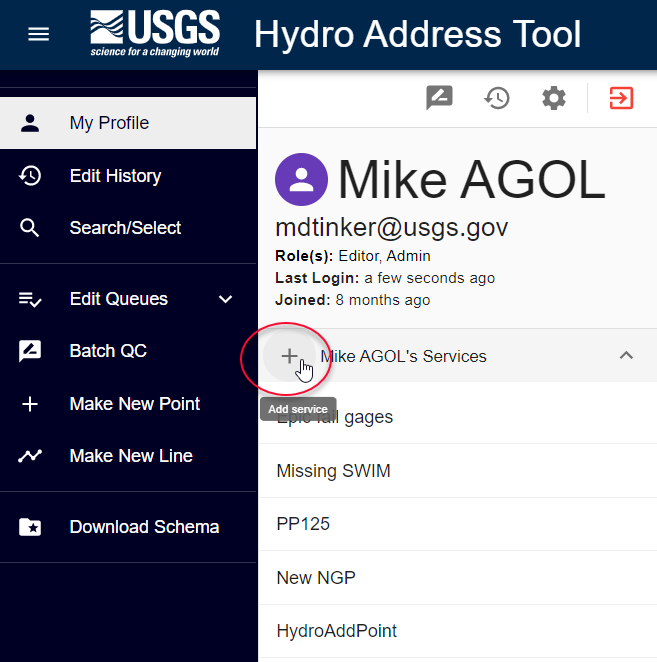
- Go to HydroAdd tool. From My profile, click Add Service button.
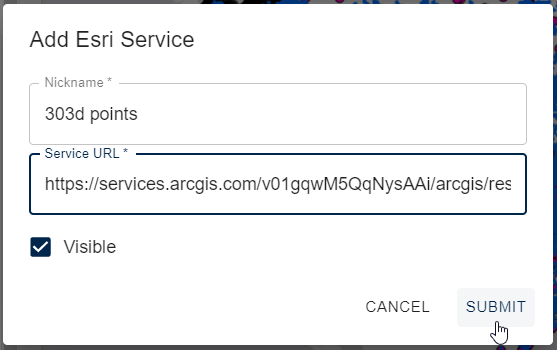
- Paste the URL and enter a nickname for the service.
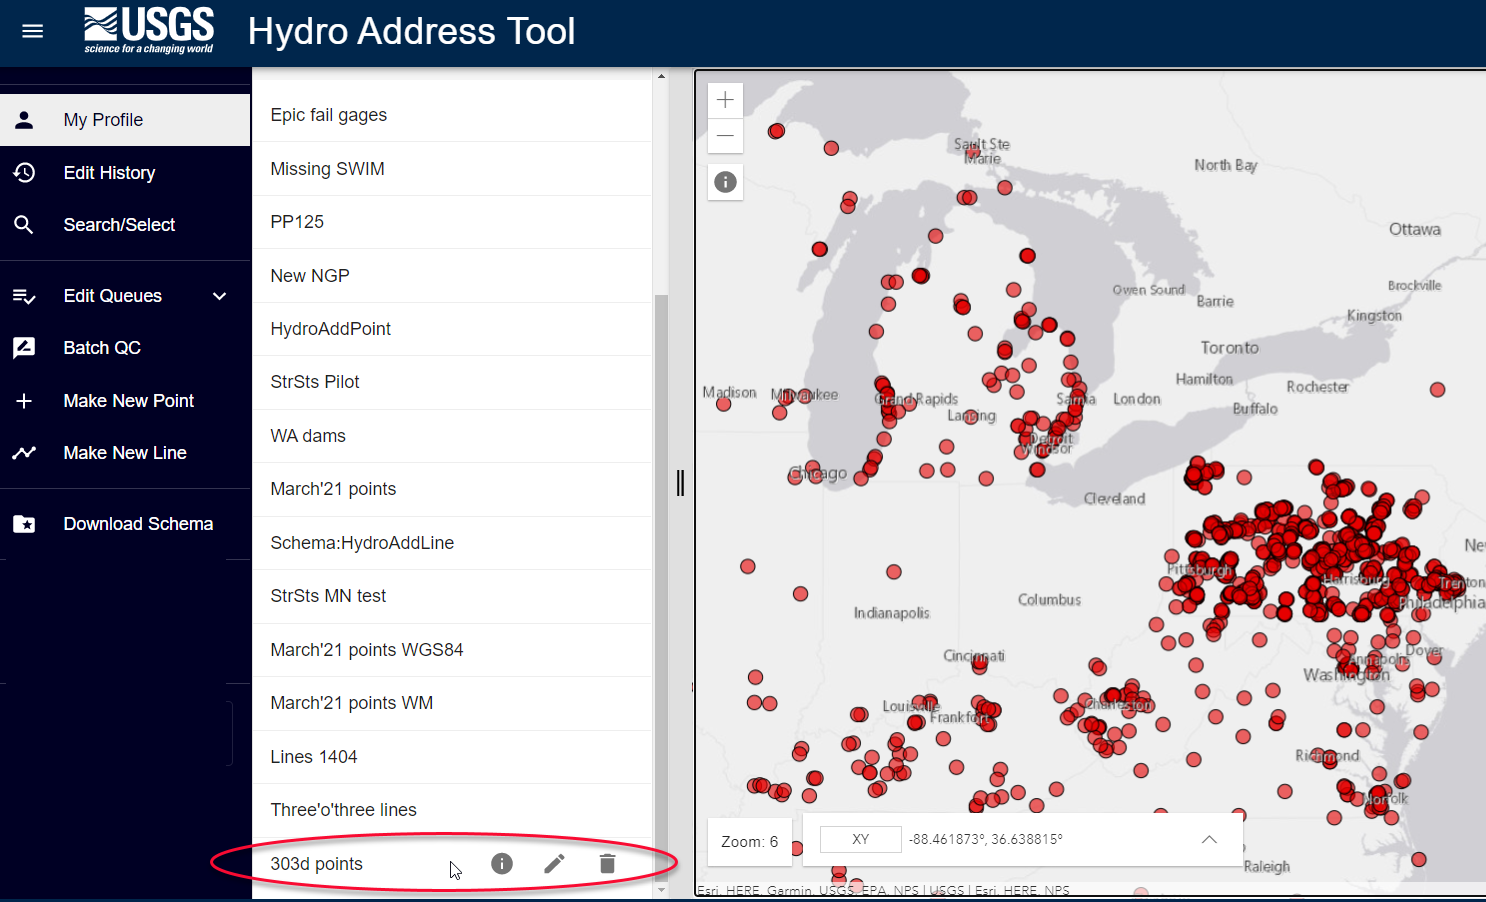
- The data appears in your list of services and on the HydroAdd map.
You are ready to edit!